Follow this step by step Adobe Illustrator tutorial to create a simple vector ninja character. The design is made from basic shapes and uses Illustrator’s core tools, which makes this tutorial perfect for beginners.
The ninja character we’ll be creating is made up of simple shapes to create a cute overall appearance. Despite being generally dark in colour we’ll add definition to the character with the help of strokes and gradients using subtle changes in tone.
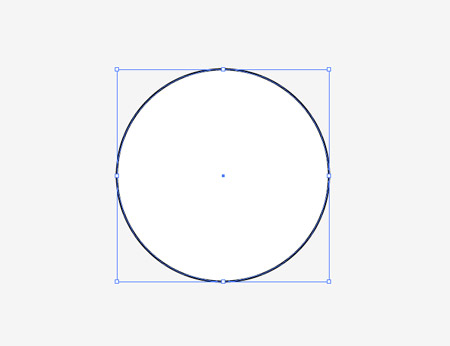
Open up Adobe Illustrator and draw a circle on the artboard, this will be the base of the ninja’s head.
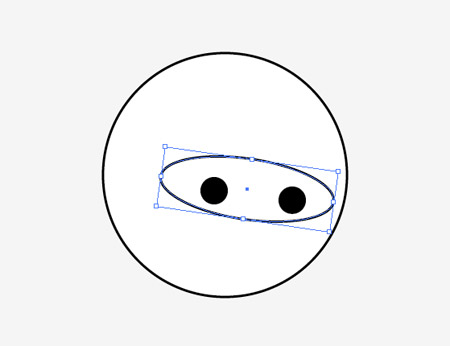
Continue using the circle tool to draw the eyes, starting with the hole in the mask with a rotated oval, then a couple of generic eyes using two solid circles.
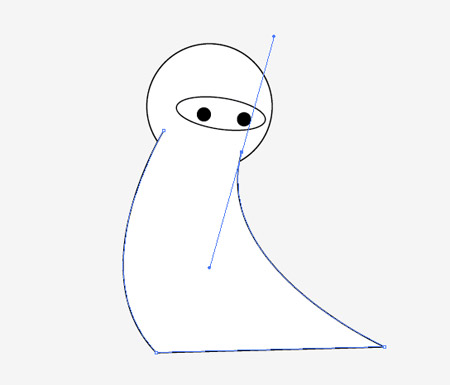
Use the Pen tool to draw the body, click and drag out lines to create a slightly curved, dynamic looking body shape. Press CMD+Shift+[ to send this item underneath the head.
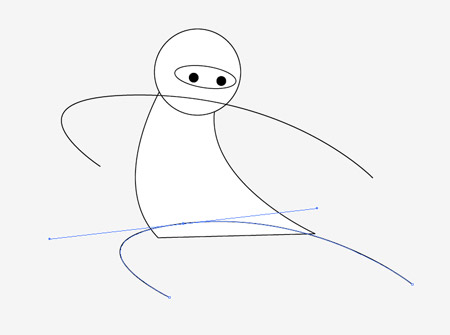
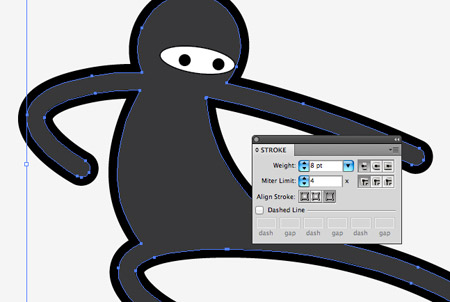
Click and drag flowing lines across the body to represent the arms and legs in an exaggerated combat pose. Drag out long bezier handles for smooth curves.
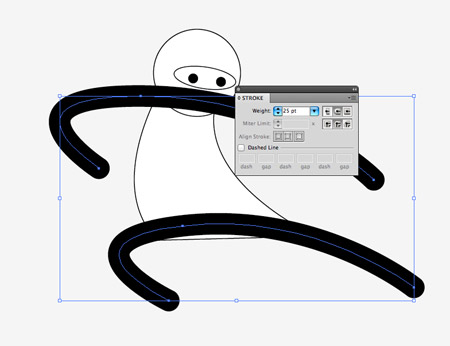
Increase the stroke of these lines to around 25pt and change the option to Round Cap to smooth off the ends.

With both the lines selected go to Object > Expand. Select just the Stroke option to convert these paths into solid shapes.
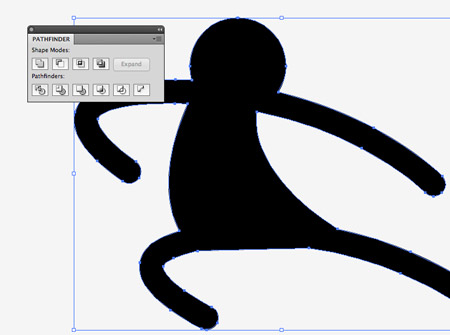
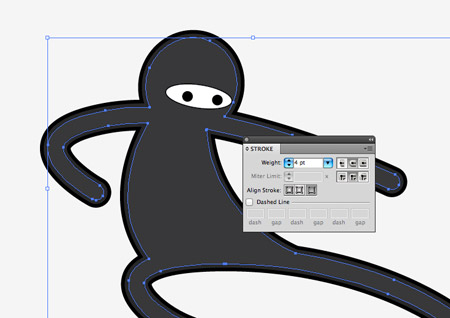
Select the head and hit CMD+C to copy, we’ll need this shape again later. Add the body, arms and legs into the selection then click the Merge option from the Pathfinder window.
Change the fill colour to 90% black and adjust the stroke to 8pt black aligned to the outside.

In the Appearances palette select the Add New Stroke option from the fly out menu in the top left corner.
Adjust this new stroke to 4pt 93% black, aligned to the outside to create a double stroke effect.
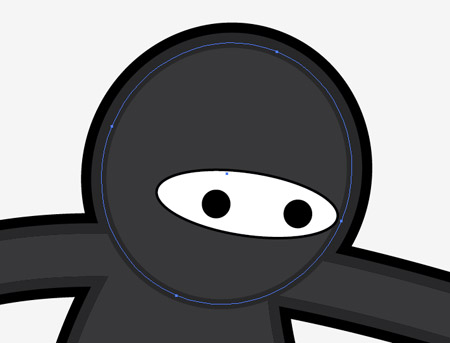
Press CMD+F to paste in the copied head shape back into position. Change the fill colour to the 90% black and give it the 4pt 93% black stroke aligned to the outside. Press CMD+[ until the head sits under the shapes that make up the eyes.
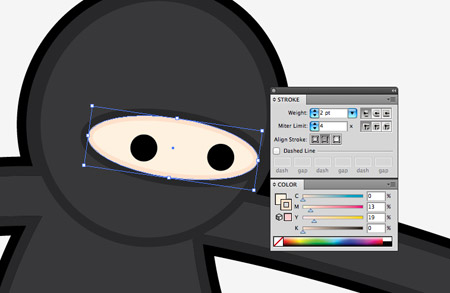
Select the mask outline and give it the grey stroke, then adjust the fill colour to a natural skin tone. Add a second stroke and align it to the inside then select a slighter darker tone than the skin.
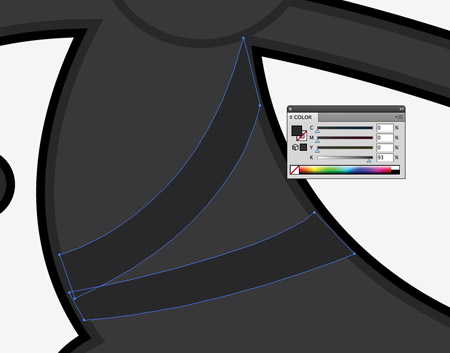
Use the Pen tool to draw some belt shapes across the body of the ninja character, give these a fill of 93% black so they blend with the stroke outline.

Our little ninja character is looking pretty good so far, but to really add some depth and an extra dimension we can make use of some subtle gradients.
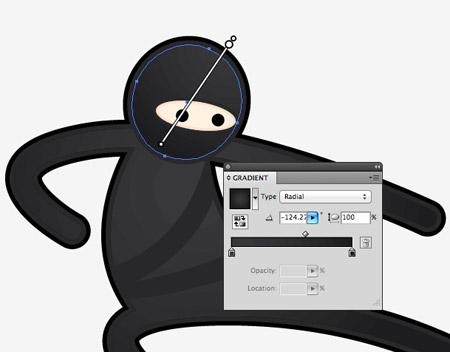
Swap the solid fills on both the head and body shapes for a 90% black to 95% black radial gradient. Use the Gradient tool to adjust the flow so it runs smoothly across the shapes.
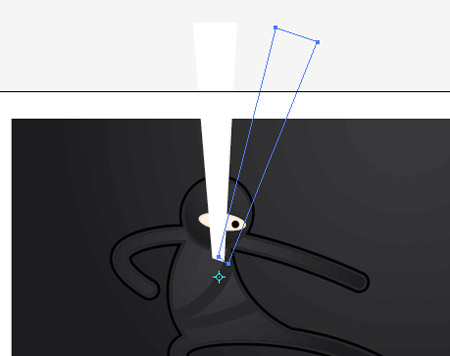
Finish off the ninja character design with a simple background, then draw a basic rectangular shape with a white fill. Select a pivot point for the Rotate tool then drag out a copy while holding the ALT key.
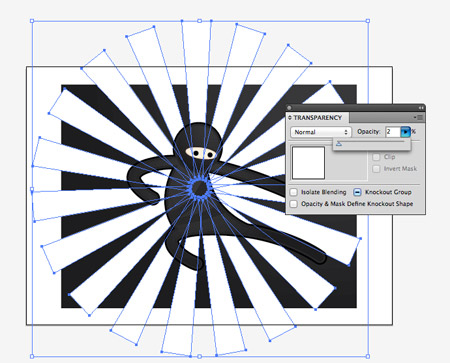
Repeatedly press CMD+D to repeat the rotation until you have a full circle of flaring shapes. Group all these shapes together and reduce the opacity to around 2%.
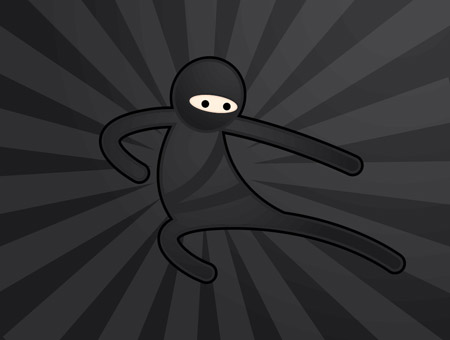
Our little ninja character is now complete. The basic shapes help give the character that stylised vector appearance while the subtle gradients and strokes all help add to the ninja’s stealthiness against the dark background.
Download the source file