One of the most important Photoshop skills you need as a Designer is the ability to clip out images of various detail using masks or selections. Whether you’re creating designs for print, web or just fancy artwork it’s inevitable that you will be faced with the task of removing a subject from its background in a photograph. This post describes the various basic and advanced techniques you should have in your arsenal, which will allow you to tackle any masking situation that comes your way.
To begin, let’s take a look at what I call the “novelty” selection tools and techniques that are available in Photoshop. Despite every new edition of Photoshop touting these features as the hottest addition to the app they’re often seen as pretty amateurish in the industry. Saying that all these basic techniques do have their place, but only if your image has definite edges and plenty of contrast between the pixels you want to keep and those you don’t.
Magic Wand

Nothing screams amateur more than the good old Magic Wand tool. Simply click your wand on the area of an image you want selecting and Photoshop will magically outline it for you ready for editing. The Magic Wand can be handy for those super clean, high resolution photos isolated on white but for anything else the results aren’t up to scratch.
Quick Selection Tool
The next step up from the Magic Wand is the Quick Selection Tool. Instead of allowing Photoshop to do all the calculations, with the Quick Selection Tool you at least give it an idea of the area you want selecting. Results can be more desirable than the Magic Wand, but as the name suggests it’s still only a quick and dirty method.
Lasso Tool/Magnetic Lasso Tool

Although the Lasso Tool is an extremely useful tool in some design workflows it’s not great for clipping out images. It’s easy to use and does the job, which is probably why it’s the most commonly used tool, but its main drawback is its inability to produce smooth curves, as well as being uneditable.
Eraser/Background Eraser/Magic Eraser tool
Another “amateurish” tool in the Photoshop arsenal is the Eraser tool and its reincarnations in recent versions. It’s seen as amateurish because it’s usually the first method Photoshop newcomers employ when removing the background from an image, but it soon teaches you that destructive Photoshop techniques always end in tears.
If you want to be prepared for any Photoshop clipping challenge that comes your way you’ll need to arm yourself with some advanced techniques. Not every photograph is nicely isolated on a white background, but these three techniques (or a combination of two) will allow you to clip out any image imaginable.
The Pen Tool
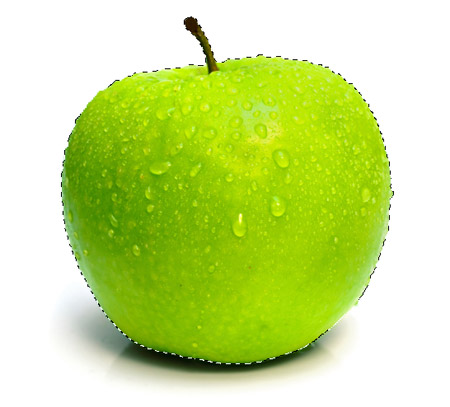
The mysterious Pen Tool is often avoided by Photoshop newcomers, but it’s definitely one of the most important tools you should aim to master. The basic principle is the same as the Lasso Tool, manually draw around your subject to make a selection. The Pen Tool’s advantage over the Lasso tool is its ability to create smooth, flowing curves that are editable and can be saved. With the Lasso tool once you’ve made your selection you’re stuck with it, whereas the Pen Tool can be edited/manipulated and saved within the image file for use at a later date.
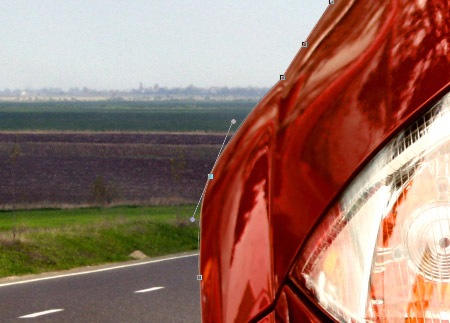
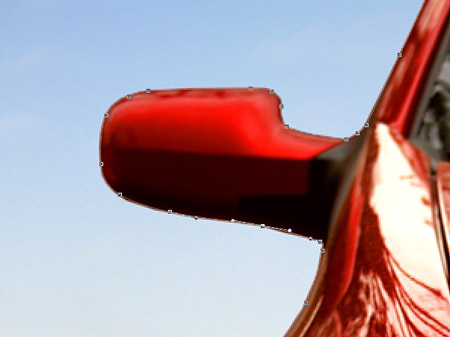
Select the Pen tool and begin outlining your subject. There’s two methods you could use, the click and drag approach where you pull out bezier handles with each click, or the backtracking technique where you draw a straight path between two points then add in a third point and drag the handles into place.
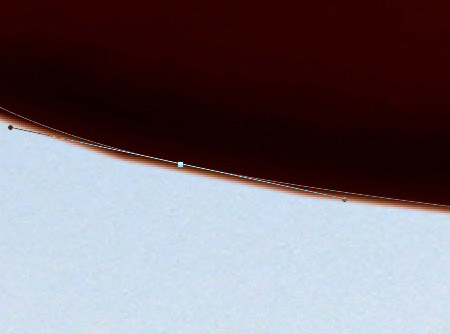
When outlining with the Pen tool stay within your subject by 1-2px to make sure none of the background leaks into the selection.
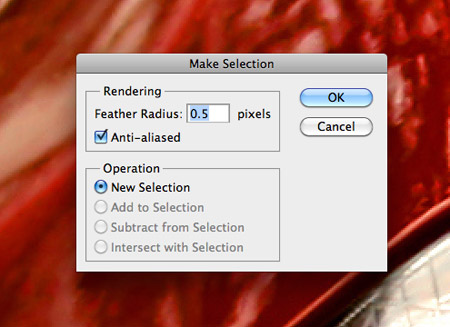
Once the path is complete, right click and Make Selection. Alter the Feather Radius to avoid unnatural harsh edges, 0.5-1px is usually a good rule of thumb. Rename the Work Path in the Paths palette to save the path as part of the image so it can be reused later.
Useful for: Clipping out solid objects such as product shots. Masking subjects that don’t have good contract against their background.
Layer Mask

The Layer Mask is the Photoshop Guru’s alternative to the Eraser tool. The Eraser tool is a destructive technique, whereas a Layer Mask can be easily corrected or removed altogether. The great thing about Layer Masks is all of Photoshop’s usual tools can be used to create your mask, so marquee selections, brushes and gradients could all help make the perfect mask. The basic principle behind Layer Masks is black is see through and white is solid, so whatever area of your mask is black will effectively be erased from the image, unless you want it back, in which case you would just paint it white instead.
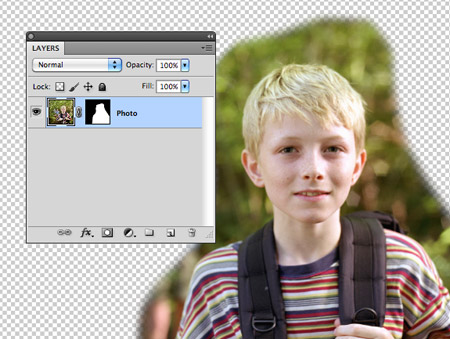
Click the Add Layer Mask icon at the bottom of the Layers palette to add a mask. A common technique is to use the brush tool to paint out the background of an image just as you would with the eraser tool.
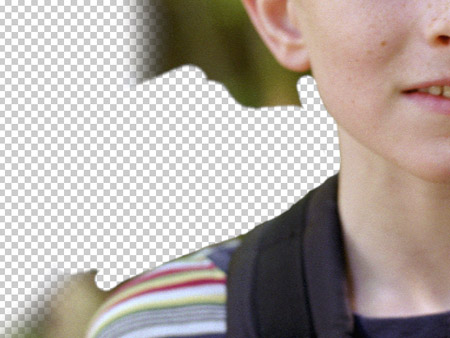
Using brushes, particularly with a pen tablet means you can make natural selections with the help of pen pressure and the softness of your brush tip.
Useful for: Intricate images that would be too tedious to trace with the Pen Tool. Masking images with soft or fuzzy edges.
Channels
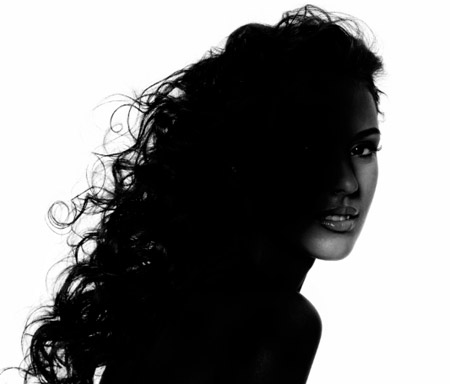
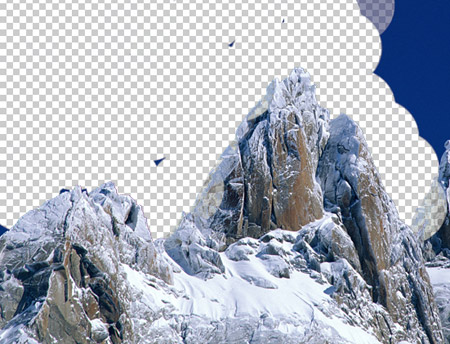
The Channels technique can be a lifesaver, but it tends to only work in certain scenarios. If you have an intricate image that retains good contrast the Channels method is the perfect solution. The idea is that you chose either the red, green or blue channel depending on which has the best contrast and you use it to adjust the image tone with the Levels or Curves tools in order to create an easy selection. If you ever work on studio photos of models, the Channels approach will be your best friend for clipping out hair and clothing.
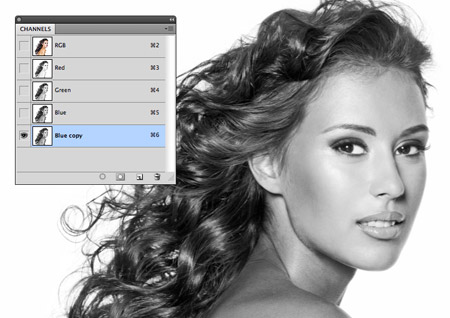
Switch to the Channels palette and toggle between the red, green and blue layers to find the image with the most contrast. Drag your chosen channel into the “New Channel” icon to create a copy.
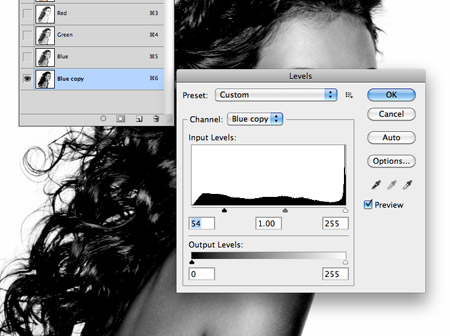
Use the Levels and Curves adjustment tools to boost the contrast to make the areas you want to keep black and the areas you want to ditch white. Be careful not to go too far otherwise you’ll end up with dirty edges.
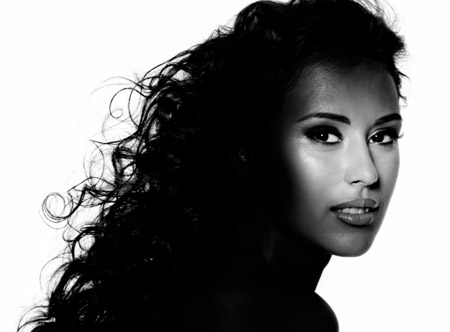
Use the burn tool to paint over any outstanding details or highlights that need adding to the mask. As you can see, the channels method picks up on even the finest of hairs, making it a much better choice than a Magic Wand, Pen Tool or Layer Mask selection.
Useful for: Images with good contrast between the subject and background. Perfect for clipping out hair.