lundi 30 août 2010

Spoon Graphics | Latest Blog Entry

Spoon Graphics | Latest Blog Entry


How To Create a Fun Cartoon Style Poster Design

Posted: 29 Aug 2010 11:45 PM PDT

Follow this step by step guide to creating a fun cartoon style poster design. We’ll combine a quick character doodle with some bold and blocky text, then bring it to life with a muted colour palette and a mix of textures to give the poster an old and retro feel.

Sloth cartoon poster

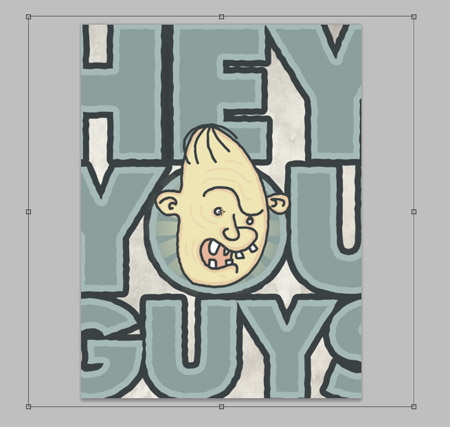
The design I’ve created is a mini tribute to the Sloth character from the Goonies. The quick doodle depicts the basic form with just a few simple doodle lines. All the linework, including the outline of the text is given a rough texture to create a hand-drawn feel, then everything is brought to life with a muted colour palette and a mix of texture additions in Photoshop.

View larger artwork

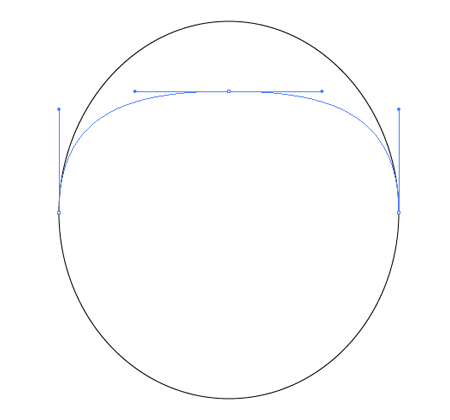
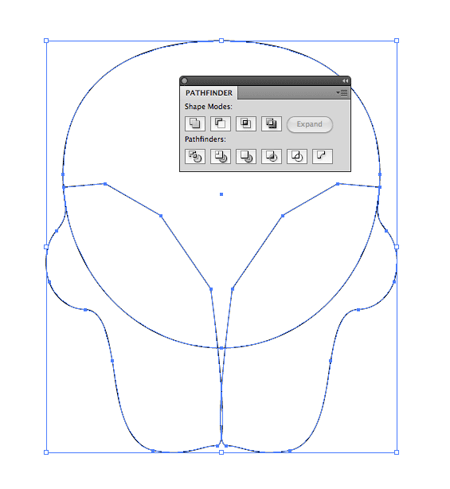
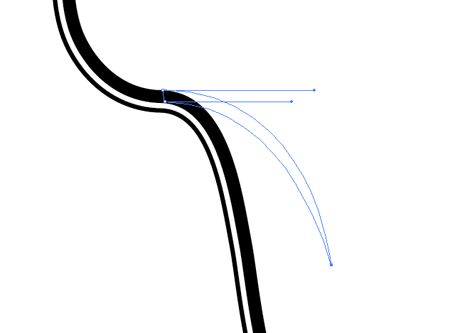
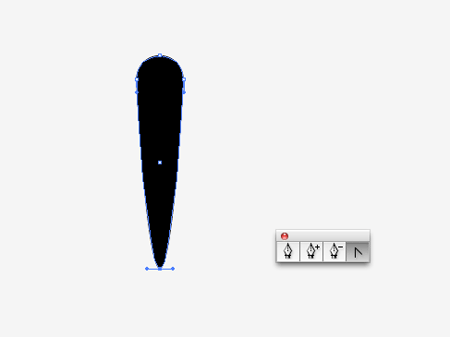
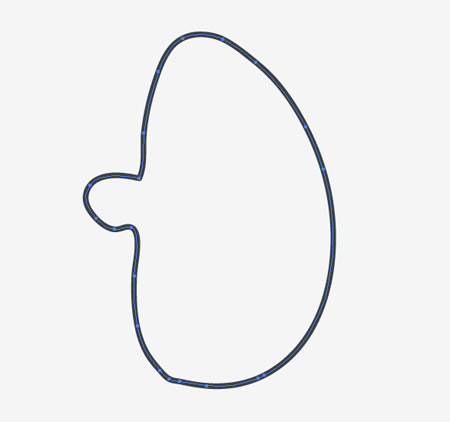
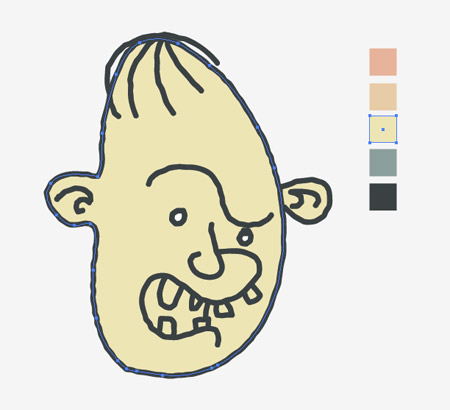
Create a new document in Adobe Illustrator and grab the brush tool. Draw the basic outline of the character’s head as a complete path. Tip: Double-click the brush icon to open up the settings. Use the Edit Selected Paths option to fine tune your linework.

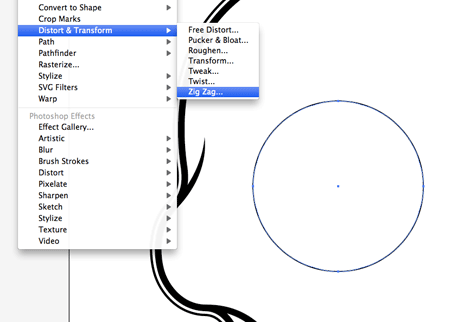
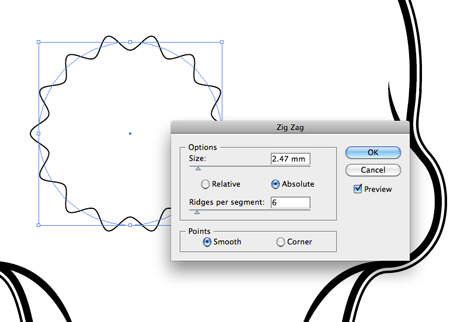
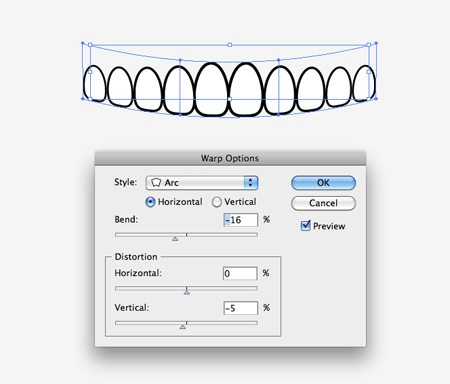
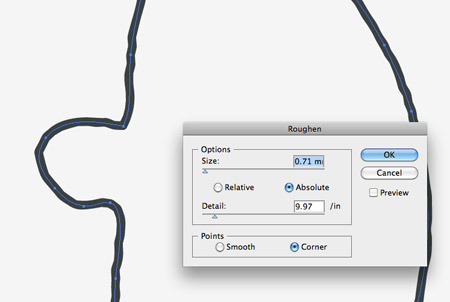
To give the linework a cool doodle effect, go to Effect > Distort & Transform > Roughen. Adjust the sliders to limit the effect down to just a few subtle bends and kinks in the lines so the basic shape is still recognisable.

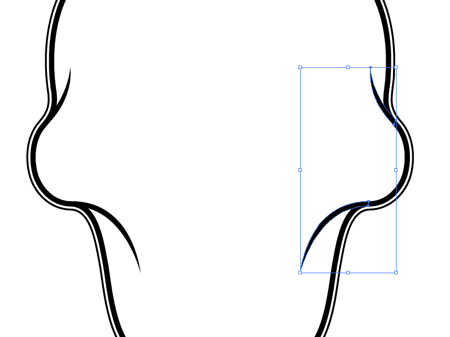
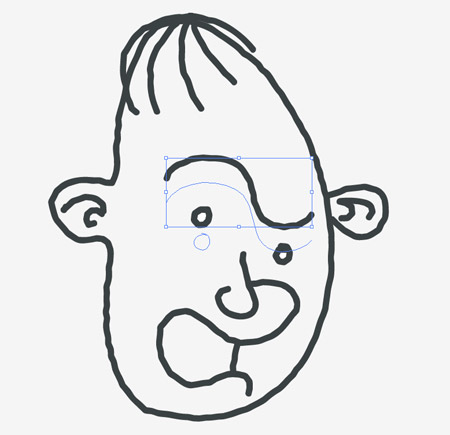
Continue drawing the facial features with the Brush tool. The same stroke and roughen effect should be continued through onto the subsequent lines.

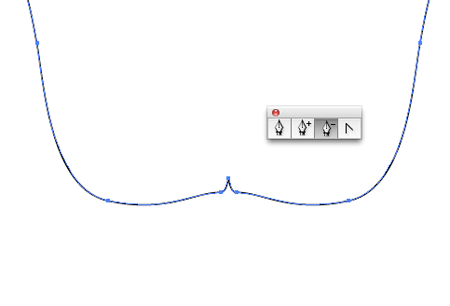
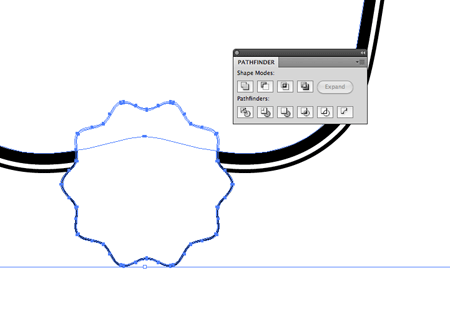
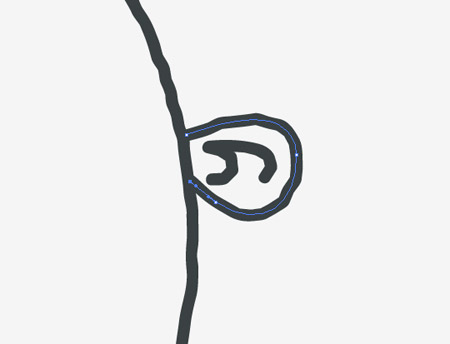
Use the Direct Selection Tool to tweak the position of the end points to ensure the lines overlap without a gap.

The great thing about doodling in Illustrator is you can easily move things around if you didn’t get the positioning quite right the first time.

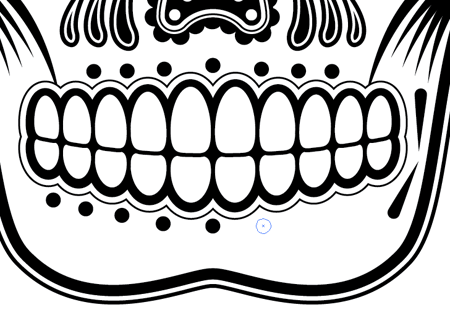
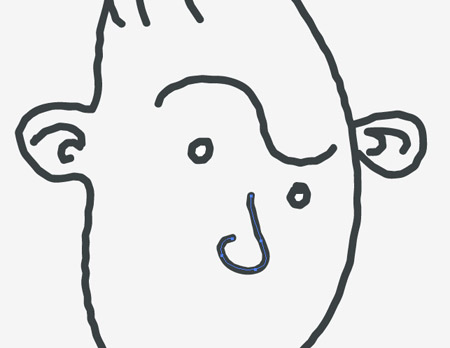
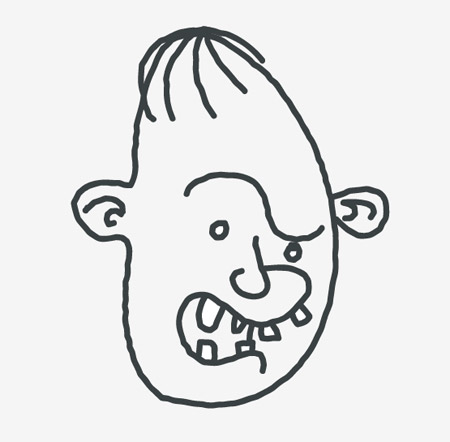
Finish off the character with the remaining facial features. Being a doodle the artwork doesn’t need to be super high quality. Anything goes, make it as rough as you like!

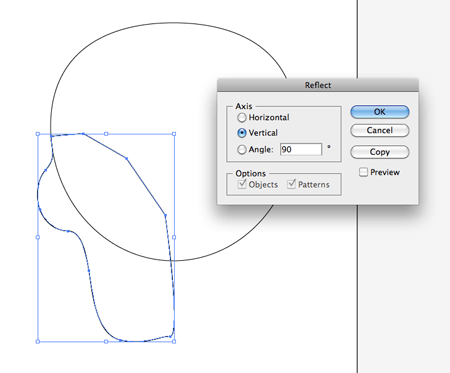
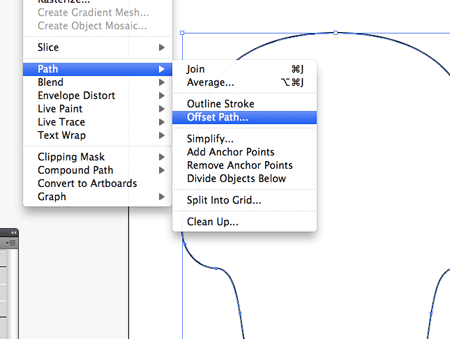
Find a suitable colour palette to use for your design. I found this muted palette from ColourLovers. Copy (CMD+C) the main outline of the head and paste behind (CMD+B). Clear out the stroke and add a flesh coloured fill from the colour palette.

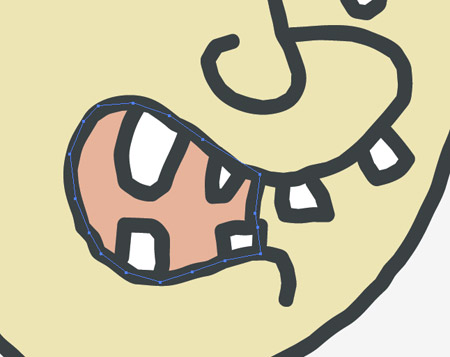
To fill elements that aren’t complete shapes, use the Pen tool to roughly draw an outline that stays within the width of the stroke. Fill this shape with a relevant colour swatch then repeatedly press CMD+[ to alter the stacking order until it sits underneath the strokes.

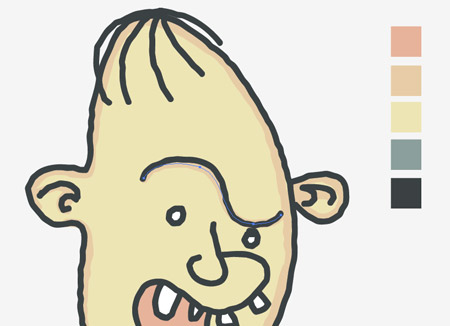
Select the Brush tool again and increase the brush size using the ] key. Add a slightly darker flesh tone as a stroke colour, then trace around the existing linework. The larger brush size will create a basic shading effect. Send these strokes below the darker linework using the CMD+[ shortcut.

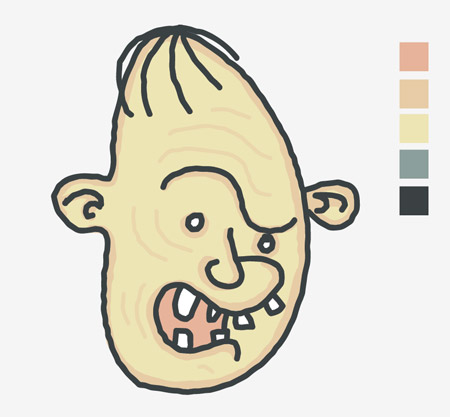
Decrease the brush size slightly then draw some subtle facial wrinkles using the same darker flesh tone.

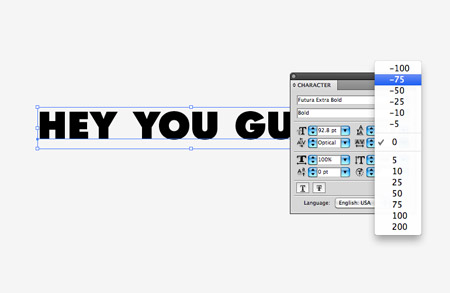
Sloth's iconic "Hey you guys!" quote has to appear in the design. Type it out and select a nice chunky font. Here I'm using Futura Extra Bold with the tracking adjusted to -75.

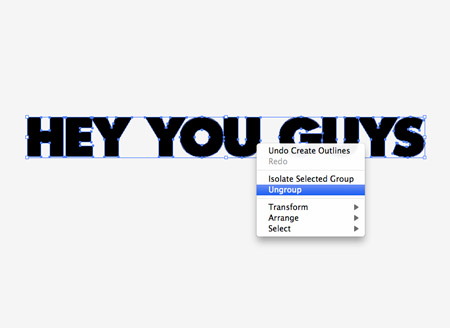
Press CMD+Shift+O to create outlines of the font, which essentially turns the text into editable shapes. Right click and Ungroup, then select each word and re-group (CMD+G).

Scale and position each word onto a poster sized artboard. Hold Shift while scaling to constrain the axis and keep the text in proportion.

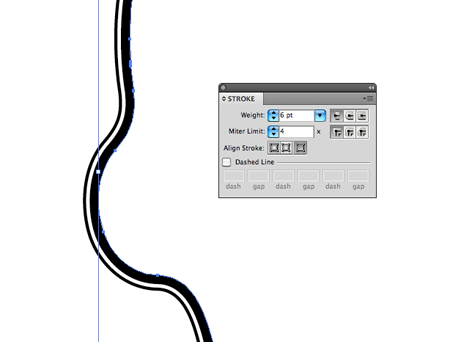
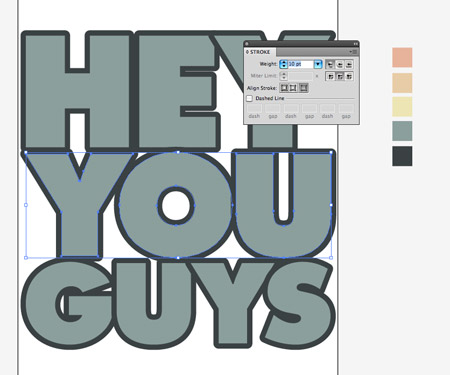
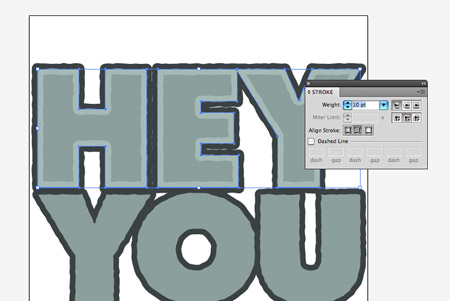
Use the eyedropper tool to alter the fill colour of the text, then add a darker stroke from the colour palette. Bump up the stroke weight and align it to the outside by adjusting the options in the Stroke palette.

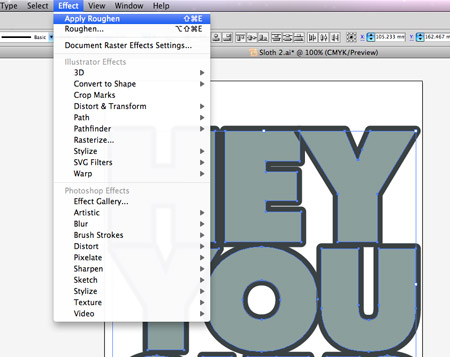
Give the text that same doodle feel by going to Effect > Apply Roughen - Because this effect was the last used this shortcut will apply the same settings.

Copy (CMD+C) the text and Paste in Front (CMD+F). Clear out the fill and adjust the Stroke settings to a lighter shade aligned to the inside. Repeat the process on the other two words.

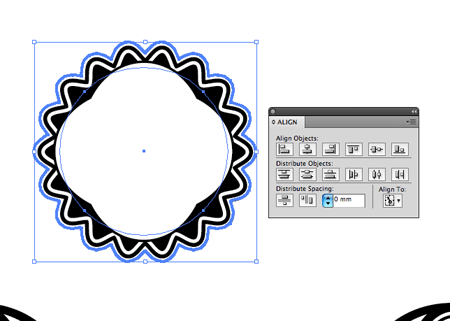
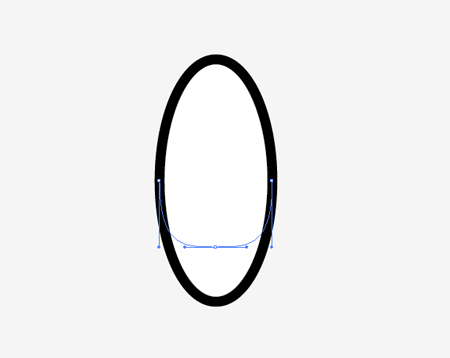
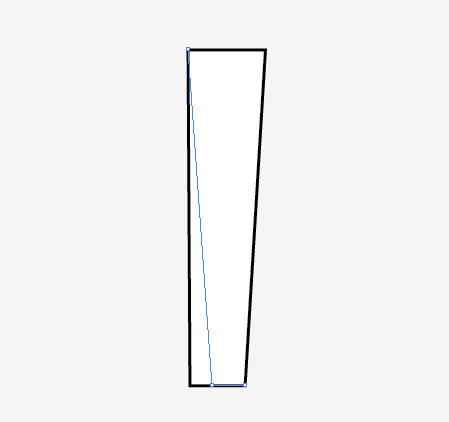
Draw a rectangle elsewhere on the page. Use the Direct Selection Tool to select and nudge the two bottom corner points closer together.

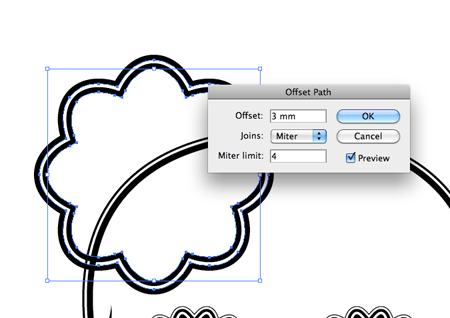
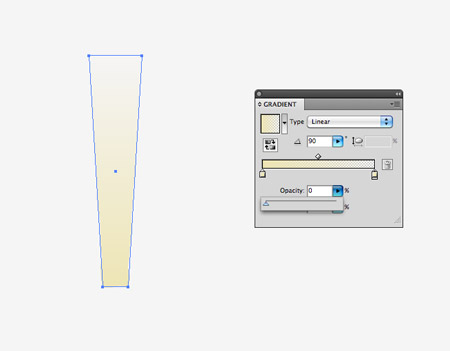
Add a Gradient as the fill colour to the new rectangle shape. Add a yellow swatch to both ends of the gradient spectrum, then adjust the Opacity to zero on one side.

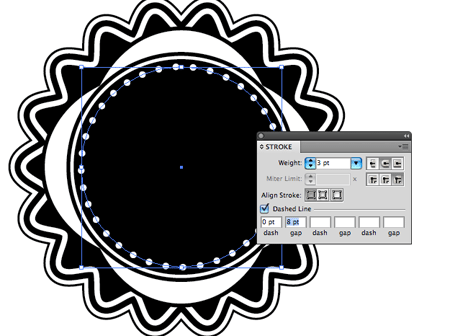
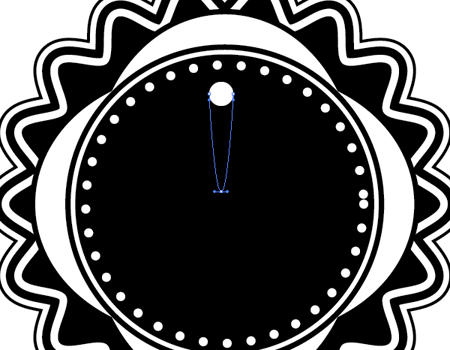
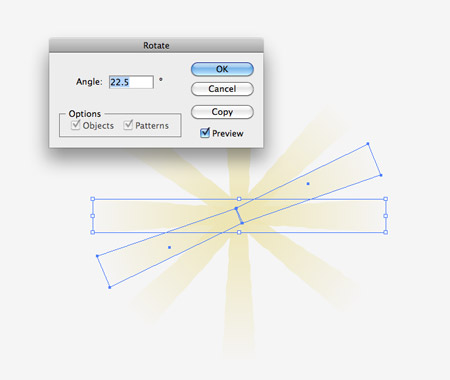
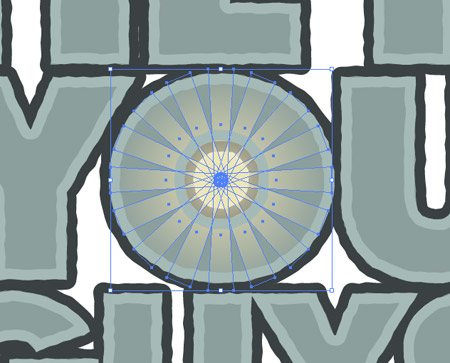
Copy and paste the rectangle and rotate it by 90 degrees. Align it to the lower edge of the original then make duplicates in order to form a series of radial flares.

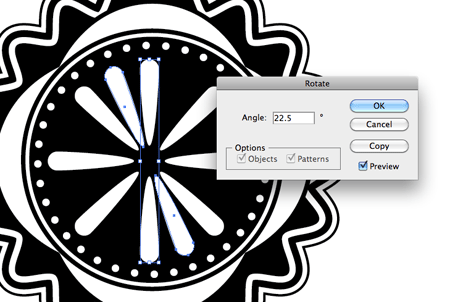
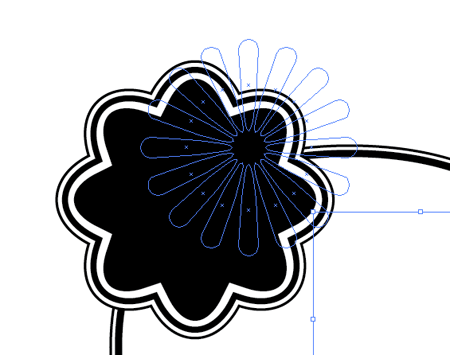
To fill the smaller gaps between the 45 degree angles go to Object > Transform > Rotate. Enter 22.5 in the options (45 divided by 2 = 22.5). Continue duplicating and rotating this new shape to fill out the rest of the pattern.

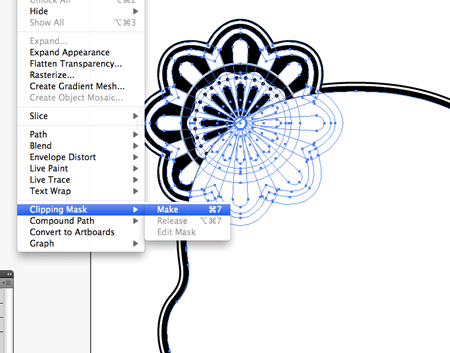
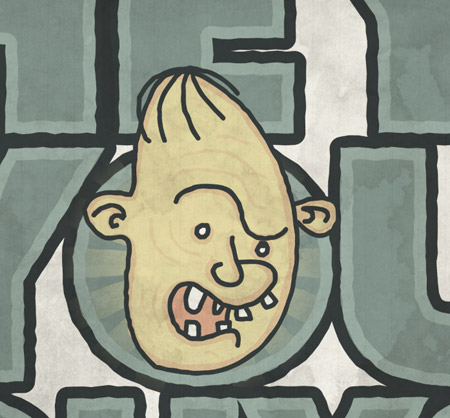
Position the flare in the centre of the letter 'O' on the design. Scale the flare to extend to the outer stroke of the wording.

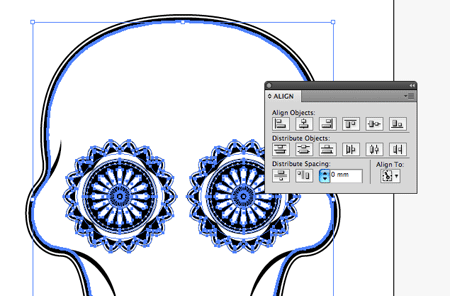
Paste in the character and scale it to fit roughly in the centre of the radial flares. Ensure the character is at the top of the stack by hitting CMD+Shift+].

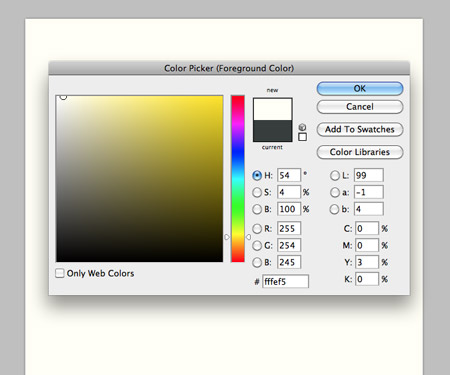
Next we’ll move over to Photoshop to add some cool textures and make use of the powerful blending modes. Create a document according to your poster size and fill with a subtle yellow background colour.

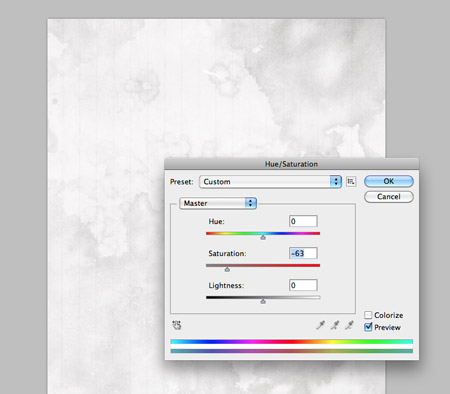
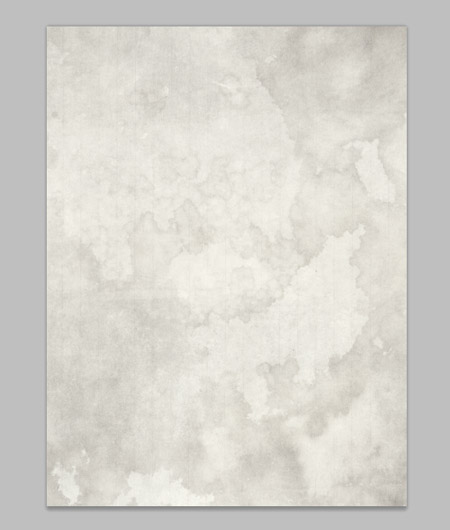
Paste in a detailed texture file and desaturate to remove the original colouring. Set this layer to Multiply.

Paste in another texture file and set this layer to Multiply. The two textures will interact with each other as well as the yellow background colour.

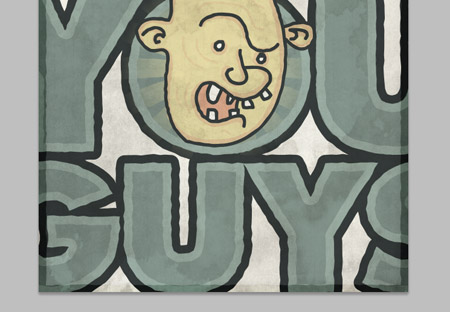
Next, paste and scale the vector design from Illustrator. Enlarge the design so the text completely fills the canvas.

Change this layer’s Blending Mode to Multiply to allow the textures to interact with the crisp vector colours to give a cool retro feel.

Quickly switch back to Illustrator to create a thick rectangular stroke with the roughen effect.

Paste this into Photoshop and change the blending mode to Soft Light. Adjust the Opacity to 80% to create a subtle border.

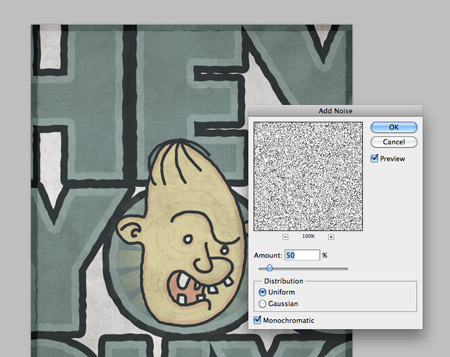
Create a new layer and fill it with white. Go to Filter > Noise > Add Noise and adjust the settings to around 50%. Change this layer’s blending mode to Multiply and turn down the opacity to around 20%.

Sloth cartoon poster

The final poster is complete! It combines the best of both applications – The sharp and crisp vector lines of Illustrator and the powerful blending modes of Photoshop.

Download the source file

samedi 28 août 2010

Spoon Graphics | Latest Blog Entry

Spoon Graphics | Latest Blog Entry


Apple iPhone Style Icon Pack for Premium Members

Posted: 27 Aug 2010 01:49 AM PDT

IconDock have kindly donated another premium icon pack from their fantastic collection for Access All Areas members. Moi is a set of 268 high quality icons inspired by the iPhone app icons. They are especially designed to match with their free social media icons.IconDock is the place to ...

Log in to your Access All Areas account to read the rest of this post.

Not a member? Becoming an Access All Areas member gives you the ability to view exclusive members-only content just like this. The premium category is already packed full of discount codes and useful design resources, and there's plenty more to come! Find out more about becoming a member, or take a peek at what's available to premium members so far.

lundi 23 août 2010

Spoon Graphics | Latest Blog Entry

Spoon Graphics | Latest Blog Entry


How To Create a Detailed Vector Sugar Skull Illustration

Posted: 22 Aug 2010 11:04 PM PDT

Follow this Illustrator design tutorial to create a super detailed sugar skull illustration made from lots of sweet vector elements. We’ll use a mix of basic and advanced Illustrator tools to build various decorative objects to slowly build up the features until we have an awesome looking skull design that pays homage to the Mexican Dia de los Muertos tradition.

Vector sugar skull illustration

View full size illustration

Sugar skull research

Sugar skull originated as part of the festivities of the Mexican Day of the Dead (Dia de los Muertos) holiday. The traditional sugar skull is a sweet treat that’s decorated with lots of bright and colourful designs, which makes it a popular source of inspiration for designers and illustrators. The sugar skull theme is also hugely popular as tattoo art, and makes an equally trendy apparel design. A quick search online brings up plenty of resources to feed your imagination and generate ideas for your own skull design.

Let’s get started with out own vector sugar skull Illustration. Open up Adobe Illustrator and draw an oval onto the artboard. Use the Direct Selection tool to drag the upper most point downwards (hold Shift) to flatten out the top curve.

Use the Pen tool to complete the outline of a skull by drawing a protruding cheek and jaw line. Finish the lower jaw along the centre line of the skull. Copy (CMD+C), and Paste in Front (CMD+F), then go to Object > Transform > Reflect to flip the duplicate over.

Align the duplicate to the opposite side of the skull, then merge all the objects together using the Pathfinder tool.

Zoom in and tweak the outline where the two halves are joined. Removing stray points with the Pen tool will clean up the outline and remove unwanted kinks.

With the outline selected, go to Object > Path > Offset Path. Offset the path by 3mm, then right click and Ungroup the two lines.

Add a thick 6pt stroke to the inner outline and a 2pt stroke to the outer outline. Align both strokes to the outside of the path using the Stroke palette.

Use the Pen tool to draw a flowing line from the inner outline. Hold Shift while dragging the anchor points to produce accurate angles.

Duplicate these lines and go to Object > Transform > Reflect to position them on the opposite side.

Draw a circle to represent the basic shape of an eye. Go to Effect > Distort & Transform > Zig Zag to edit the outline of the circle.

Change the settings to Smooth, then adjust the sliders to create a flowing wavy outline around the circle.

To confirm the appearance of the shape, go to Object > Expand Appearance. This will make the Zig Zag transformation permanent and allow the object to be used with the next step.

With the object selected, go to Object > Path > Offset Path. Enter 3mm in the options.

Repeat the process of adding an offset path a few more times, then adjust the fill and stroke of each item to produce alternating outlines. Use different stroke weights to add more detail.

Add another circle to the centre of the wavy outlines. This time go to Effect > Distort & Transform > Pucker & Bloat. Drag the slider around 10% towards the Pucker side of the bar.

Use the Align palette to centre up the items. Shift-click both the Pucker shape and the wavy outline, then click the wavy outline once more to set this as the key object.

Continue adding more circles using various sized stroke and alternating colours. A series of dots can be created using the Stroke palette – Check the Dashed Line option, then adjust the dash to 0 and gap to 8-10pt. Make sure the Round Cap and Round Join options are set, then adjust the size of the dot by increasing the stroke weight.

Draw a small white circle, then drag the lower most point downwards (hold Shift). Copy (CMD+C) and paste (CMD+F) this shape, rotate it by 180 degrees then move the duplicate vertically, leaving a small gap between the two objects.

Copy both items, paste, then rotate these duplicates by 90 degrees. Continue adding more shapes at 45 degree angles.

Paste another duplicate of the shapes, then go to Object > Transform > Rotate. Enter 22.5 (45 divided by 2 = 22.5) then finish off the pattern until all the elements are evenly spaced.

Two more small circles in the centre of the eye finishes off the detailed pattern nicely. Make sure everything is aligned using the Align palette. Group all these objects together (CMD+G).

Make a copy of the eye and move it to the opposite side. Group both eyes together then align them with the main skull outline. Remember to select the skull outline as the key object by giving it an extra click. This will ensure the eyes move into place, not the outline.

Elsewhere on the artboard draw an oval. Drag the lower most point upwards until the bottom edge is almost flat.

Duplicate this shape and butt it up to the previous. Scale each duplicate down by 90% (Object > Transform > Scale) and vertically align them all to the bottom.

Select all the objects and go to Object > Envelope Distort > Make with Warp. Choose an Arc with a bend of around -16 degrees. Adjust the distortion to keep the outlines of the teeth running vertically.

Go to Object > Expand and select just the Object checkbox to make the effect permanent then make a copy. Add another Envelope Distort to the lower set, but this time bend them so they run parallel to the upper teeth. Expand the second set too.

Make duplicates of the two sets of teeth, then merge these duplicates together with the Pathfinder palette. This merged version can be used to add a thick outlining stroke and an offset path.

Send the thick outline and offset path items below the primary teeth shapes by repeatedly pressing the shortcut CMD+[. Group all the items together.

So far we have the eyes and mouth in place on the skull. Use similar techniques to create a nose. Begin with a basic shape, then add offset paths with alternating fills and strokes to build up the layers of detail.

Let's build some pretty elements to decorate the skull. Draw a circle over the upper skull area, add a Zig Zag transformation, Expand Appearance then add a 3mm offset path. Alter the stroke weights and align them to the outside.

Copy the series of radial teardrop shapes from the eye graphic and scale them up for use in this decorative element. Align them so they overlap the white outline, creating a cool intersecting effect.

Continue adding circles and differently shaped elements to build up the detail. Duplicating items that have been used elsewhere speed up the process.

Once the decorative shape is complete group the items together. Make a duplicate of the skull outline (CMD+C - CMD+F). Send this item to the top of the stack (CMD+Shift+]), then use it as a clipping mask to trim out the excess from the decorative element.

Make a copy of the decorative element, then flip it using the Reflect transform option to position it on the opposite side.

Draw a couple of circles that flow across the upper skull area. Give these circles a dotted stroke. Instead of using a Clipping Mask, simple shapes like these can be clipped using the Scissors tool. Make intersections where the paths meet the skull outline then delete out the excess.

Make copies of the detail lines at the edge of the skull and rotate each one to form a series of shading lines.

A teardrop shape can be quickly made by dragging the lower most point of a circle vertically using the Direct Selection tool. Convert the anchor point to remove the bezier handles and therefore creating a sharp point.

Variations of the teardrop can be made using the Envelope Distort tool. Add a Vertical Bend of 50%.

Don’t forget to permanently fix the shape by going to Object > Expand and selecting just the Object checkbox.

Scale and position these teardrop shapes across the skull to fill out the white space and provide extra decoration. Make sure each object is also replicated on the opposite side to make the skull perfectly symmetrical.

Objects as simple as a circle can be used to fill out other areas. Align little circles around the mouth to produce another pattern.

As well as using Clipping Masks and trimming shapes with the Scissors tool, shapes can be clipped to size with the Pathfinder Intersect option. Use a copy of the skull outline to clip out the excess from objects that extend beyond the edge of the design.

Vector sugar skull illustration

Continue adding tiny vector shapes and elements to completely fill out the skull until you’re happy with its appearance, or until you lose your sanity. The final sugar skull is packed with detail and ready for combining with other elements as a poster or setting up as a cool t-shirt print.

Sugar Skull t-shirt designs

Download the source file