
Spoon Graphics | Latest Blog Entry |

| A Handy Guide to Image Resolutions in Print Design Posted: 15 Aug 2010 10:30 PM PDT Using an unsuitable image resolution is one of the most popular errors designers make when creating designs for print. The result is a fuzzy print quality, or having your file is rejected by your local printer. If you don’t keep an eye on your image resolution right from the start you may end up having to completely recreate your design file so here’s a handy guide on what to look out for, and how to ensure your designs are set up with the correct image resolutions.
What is an image resolution?
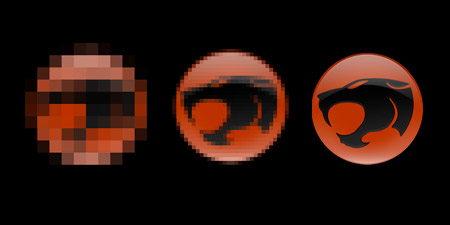
The resolution of an image refers to the density of the pixels (or printed dots) that make up that image or graphic. The higher the resolution, the crisper and more detailed the image will be. A lower resolution will be fuzzy, and less detailed. Image resolutions are measured in DPI (Dots Per Inch) and PPI (Pixels Per Inch). There are differences between the two – DPI refers to a printed document, and the amount and spacing of the Cyan, Magenta, Yellow and Black dots, whereas PPI refers to the pixels on a screen. They aren’t the same thing, but designers and print professionals tend to use the terms DPI and PPI interchangeably. Sometimes they’ll say DPI but mean PPI. For example, a 72dpi design for screen should really be referred to as 72ppi. 300ppi vs 150ppi vs 72ppi
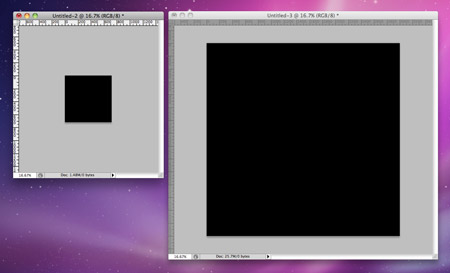
If you create a 10×10 inch document at 72ppi, and another 10×10 inch document at 300ppi in Photoshop, you’ll notice they’re totally different sizes on screen. This is because of different number of pixels used in every inch. In the 72ppi document, you can only fit a max of 720 pixels across the whole width of the document, but this is 3000 pixels in the 300ppi version. When creating designs for the web, we can usually suffice with 72ppi. If we calculate the resolution of a fairly dated 15″ 1024×768 monitor, that works out to 68ppi, whereas a more modern 1440×900 15″ MacBook Pro display would work out to 96ppi. As monitor sizes and resolutions increase they’ll be capable of displaying much higher imagery, but for now 72ppi seems to be the rule of thumb.
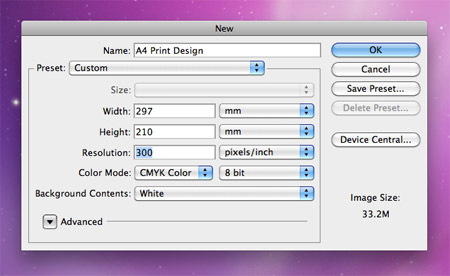
When creating designs for print we’ll usually need to use a 300dpi resolution document. Your printer might say “Make it 297x210mm at 300dpi“, so you would make a 300ppi A4 document (notice that misuse of DPI and PPI). If you accidentally created this document at 72ppi, you would have to start from scratch and recreate the design because you can’t magically generate the extra pixels you require out of thin air. If you DID change the resolution from 72 to 300, Photoshop would GUESS what colour pixels to insert, but as you can imagine the end product isn’t going to look too good. This is known as Resampling.
You CAN change a 72ppi image file into a 300ppi file by Resizing. This is when Photoshop takes the number of pixels it has to play with and divides them up so that there’s 300 pixels in every inch instead of 72. However Photoshop will soon run out of pixels, therefore the document would be much smaller. This isn’t any use for your print artwork, as your 297x210mm file would end up at 72x50mm inch in size, but it is crucial when working with photographs or posters. More on that later. Sometimes you’ll be asked to create a print document at 150ppi. This is usually the case when working with large format graphics that will only be seen from a long distance, so the close up quality doesn’t matter so much. The lower resolution makes life easier for your computer, and results in a much smaller file size. Resizing vs ResamplingWhen altering an image size in Photoshop you have two options, resize or resample. If you resample (the default option in Photoshop), you’re altering the pixel size of the document. If you resize (Uncheck the resample box), you’re altering the resolution and therefore the printed size of the document. As we know, resampling a document up is bad. Photoshop will have to guess what pixels to insert into the gaps. Resampling a document down is OK, as we’ve already got more than the amount of pixels we need. If you Resize an image, you’ll keep the same pixel size, but alter the actual print size and the resolution. Let’s see how this is useful in the real world:
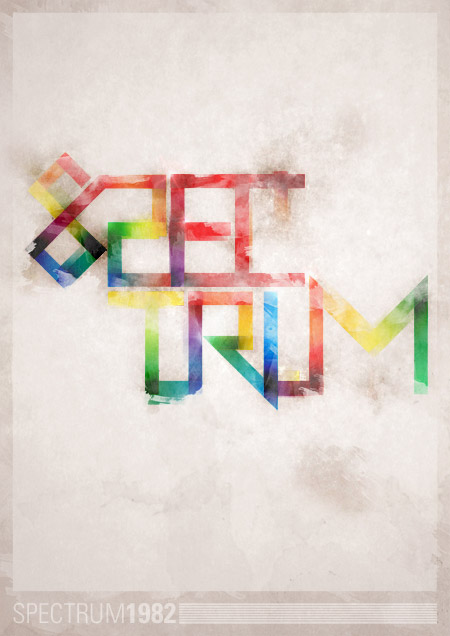
I designed this piece of artwork at A3 dimensions (297x420mm) at 300ppi. I’ve decided I want to get it printed as a poster. What size poster can I print?
The best answer would be A3, because the original 300ppi version would result in the best quality print. However my local printer will accept files of at least 150ppi.
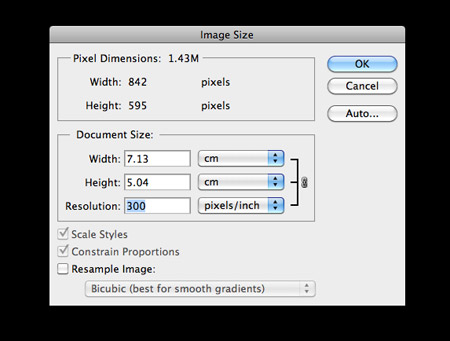
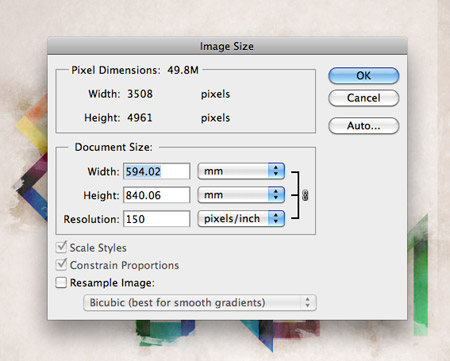
By unchecking the resample box in the Image Size settings, I can change the resolution from 300 to 150 without affecting the original image quality. Only putting 150 pixels into every inch instead of 300 means you can fill more inches. The result is a 594x840mm, which is just about A1 size. This 150ppi A1 file won’t be as crisp at the 300ppi A3 file, but the difference won’t be noticeable unless the two prints were seen side by side. For more print related articles and tutorials, be sure to check out these two older posts: Designing for Print – Setting up Crops and Bleed & The Ultimate Guide to Designing with Black |

| You are subscribed to email updates from Blog.SpoonGraphics To stop receiving these emails, you may unsubscribe now. | Email delivery powered by Google |
| Google Inc., 20 West Kinzie, Chicago IL USA 60610 | |
Aucun commentaire:
Enregistrer un commentaire