
Blog.SpoonGraphics | Latest Blog Entry |

| Photo Color Correction for the Amateur Photographer Posted: 31 Jul 2011 11:00 PM PDT I recently updated my avatars and social profiles with some new photos of the 2011 Chris Spooner. I’m by no means a pro photographer, but the photos came out pretty well if I do say so myself! The key was all in the post processing and colour correction. Follow this step by step walkthrough of my editing process to see how I transformed my basic photos into bright and crisp profile shots.
I’ve already mentioned that I’m by no means a pro photographer. The equipment I have is very basic, and the shots themselves are to be used for nothing more than online avatars and social profiles. The pro techniques will most likely include RAW files that can be tweaked at a higher level before even being imported into Photoshop. This guide is aimed at the amateurs like me, who want to make do with what they have to hand and achieve the best results.
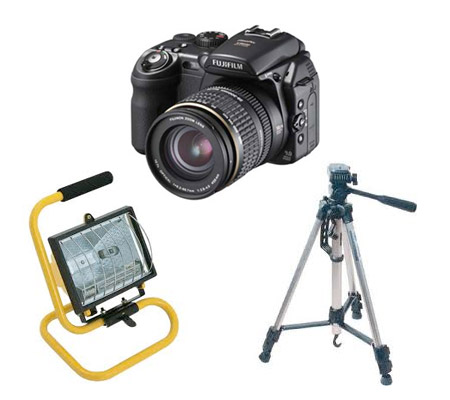
First up we actually need to take a photograph. There’s essentially three things you’ll need: 1) A camera (I use an old Fuji 9600 entry level camera). 2) A tripod (Unless you have a photography studio or a set of lamps it’s likely you’ll be shooting in low-light conditions. 3) Some kind of DIY work lamp. My photos were taken in my living room against a plain grey wall. I use the window for the majority of the lighting with the blinds altered to tone down any shadows. The DIY work lamp is positioned at the other side of the room to balance out the lighting from the window.
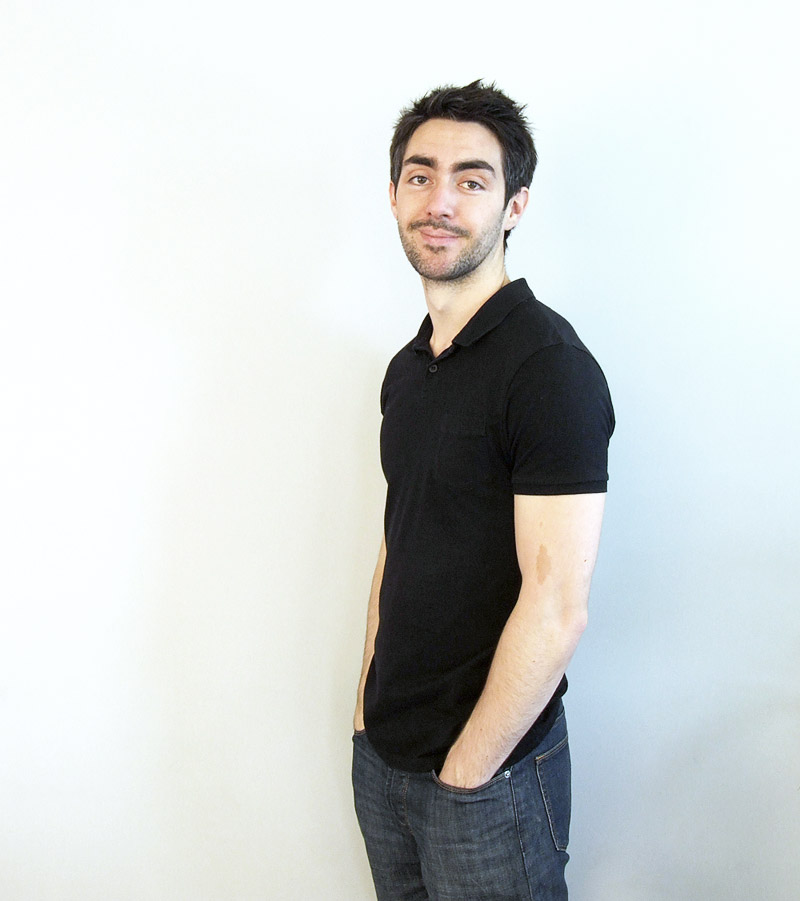
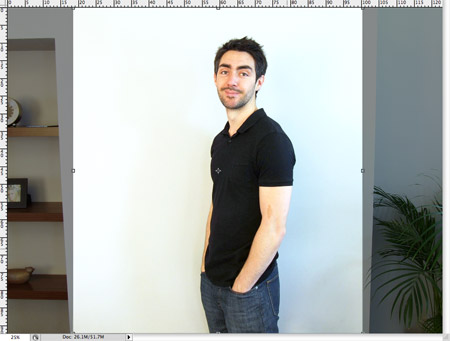
The raw photo file is nothing special at all. Being a basic camera the white balance is completely off and the photo is overall too underexposed. Not to mention that ugly guy in the middle ruining the whole thing!
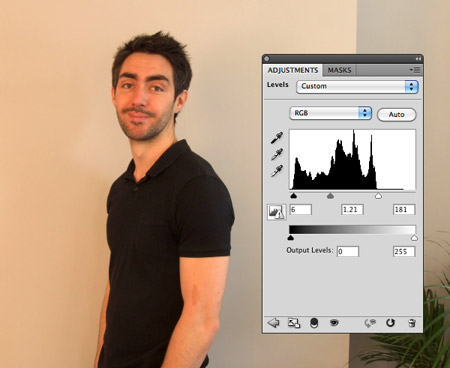
Create a Levels adjustment layer from the menu at the bottom of the Layers palette. Adjust the white coloured slider to clip the highlights to the end of the histogram. This will brighten up the overall image. Tweak the blacks to fit to the start of the histogram and adjust the greys to balance out the general tone.
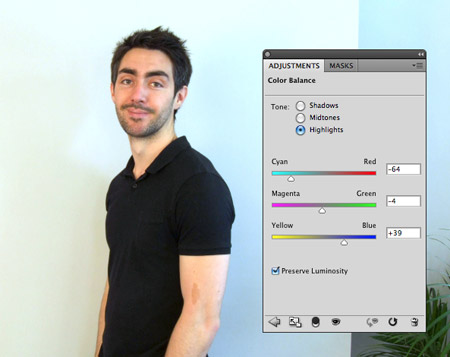
The step that completely transforms the image is the addition of a Color Balance adjustment layer. Begin with the Highlights and move the sliders to correct the tones of the image. My original had an orange tone, so really pumping up the cyan and blue helps bring back the correct hues. Go through the Midtones and Shadows and move the sliders while visually analysing the difference. Usually it’s only the highlights that require major adjustment.
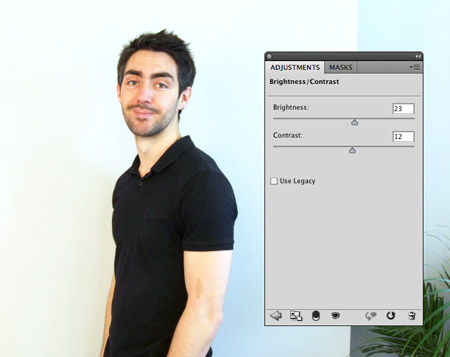
Next a Brightness/Contrast adjustment will help brighten up the image to reduce the background shadows, while the contrast will give more definition to the image.
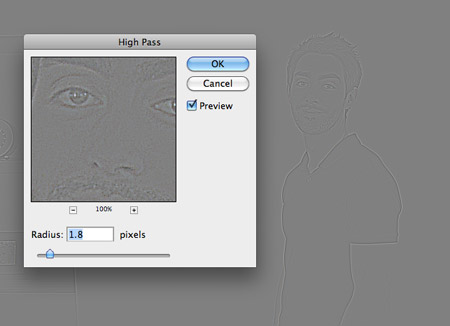
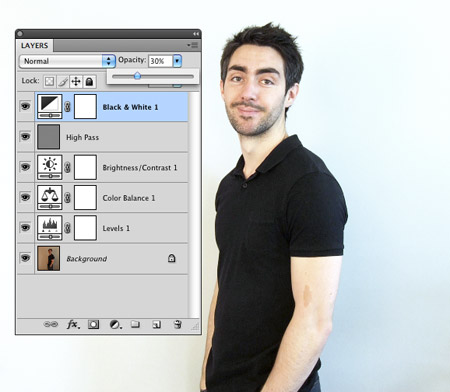
Once all the adjustment layers have been carefully tweaked, press CMD+A to select all, then CMD+Shift+C to copy. Paste this image on a new layer then go to Filter > Other > High Pass. Adjust the slider so the details are just visible from the grey.
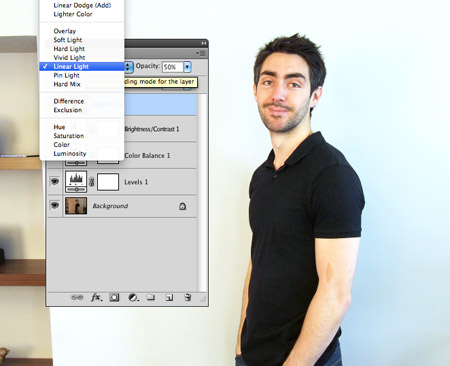
Change the blending mode to Linear Light and adjust the opacity to tone down the effect. The High Pass overlay really helps sharpen up the image and bring out the details.
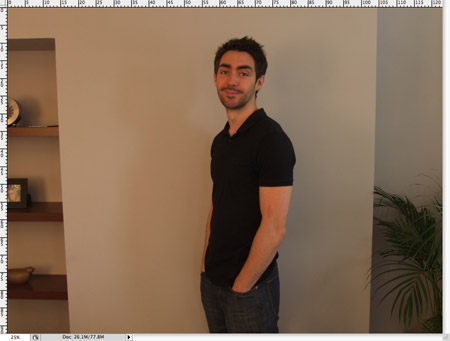
Use the Crop tool to remove any unwanted items from the background. Luckily the fairly large empty wall from my photo allows for a decent sized image.
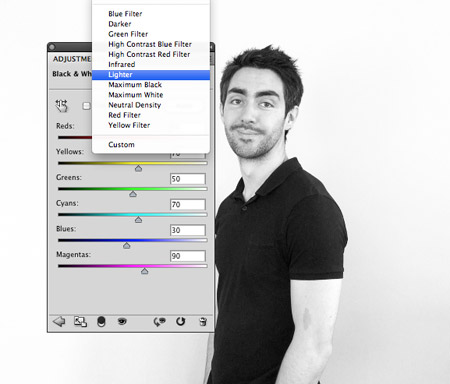
Your photo could be saved and exported right now, but there’s one extra step that can give that trendy fashion effect. Add a Black and White adjustment layer with the setting changed to Lighten.
Reduce the opacity of this Black and White layer to around 30% to desaturate the underlying image, but retain a wash of colour. Don’t go too far though, or you’ll end up looking dead!
The final photo is a complete transformation from the orange/brown dark/underexposed raw photo, but a quick few tweaks in Photoshop soon brought it to life so it can be used for your various social profiles and websites. |
| You are subscribed to email updates from Blog.SpoonGraphics To stop receiving these emails, you may unsubscribe now. | Email delivery powered by Google |
| Google Inc., 20 West Kinzie, Chicago IL USA 60610 | |
Aucun commentaire:
Enregistrer un commentaire