
Blog.SpoonGraphics | Latest Blog Entry |

| Create a Retro Triangular Pattern Design in Illustrator Posted: 19 Mar 2012 12:00 AM PDT Follow this step by step Illustrator tutorial to create the popular retro style pattern design made up of lots of colourful squares and triangles. The process is pretty simple, making this a good tutorial for newcomers to Adobe Illustrator. We’ll be using tools to accurately align our elements, then see how the Pathfinder can easily create custom shapes.
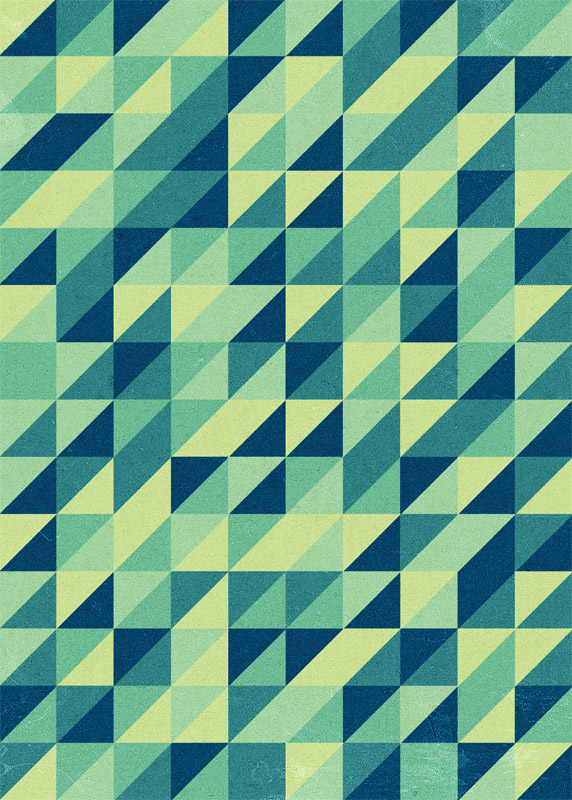
The pattern we’ll be creating is this cool retro inspired somewhat mosaic like design. The mix of squares and triangles along with the limited colour palette attracts the eye with cool illusions. View the final retro pattern design
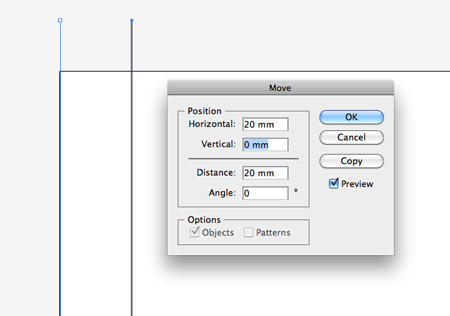
Open up Adobe Illustrator and create a new document. Select the Line tool and draw a vertical line down the left border of the artboard, then hit the Enter key to bring up the Move options. Enter 20mm in the Horizontal field then click the Copy button.
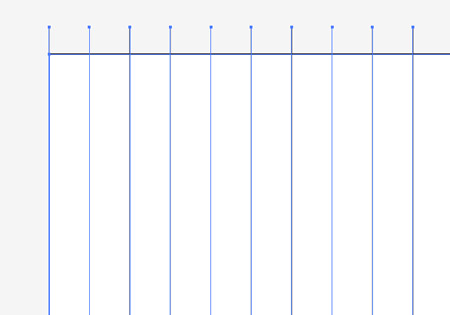
Repeatedly press CMD+D to repeat the last transformation until the width of the artboard is filled with evenly spaced lines.
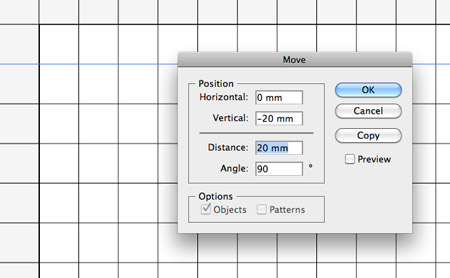
Repeat the process, but this time with a horizontal line. In the Move options window enter 20mm in the Vertical field then repeat the transformation to fill with the artboard with a grid pattern.
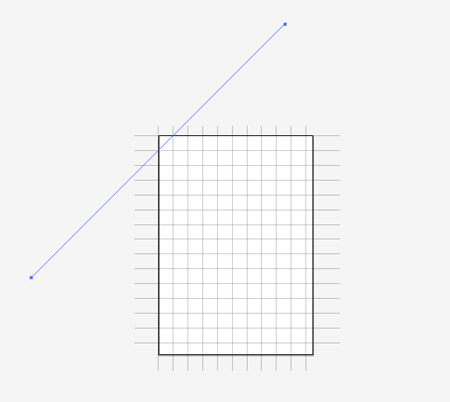
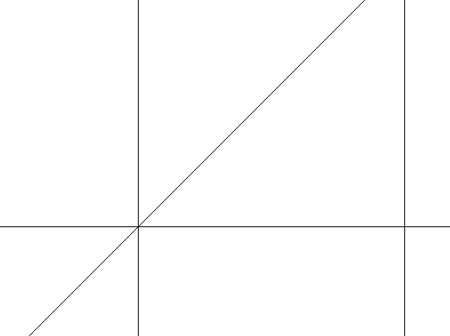
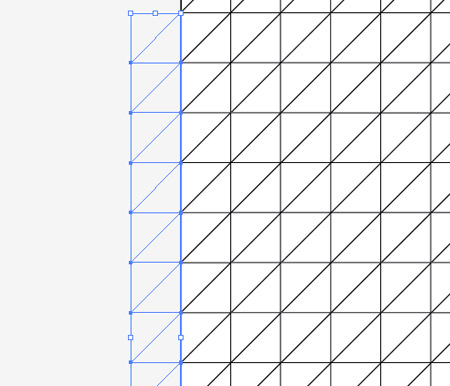
Next, draw a diagonal line at 45 degrees across the artboard. Be sure to make this line long enough to cross the whole artboard, even at its widest point.
Zoom right in and toggle outline mode (CMD+Y) and carefully align the diagonal line so it accurately intersects each grid point.
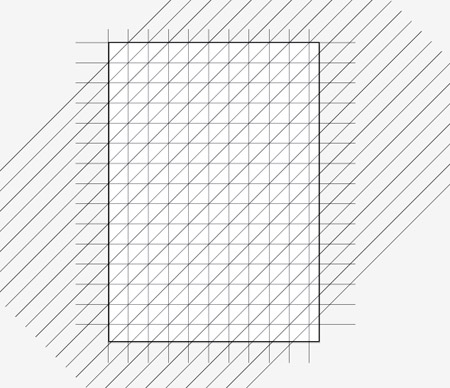
Hit Enter to bring up the Move options and enter 20mm in both the Horizontal and Vertical fields. Repeat the transformation to make duplicates to cover the artboard.
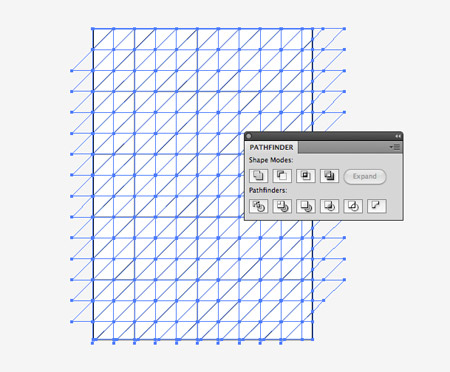
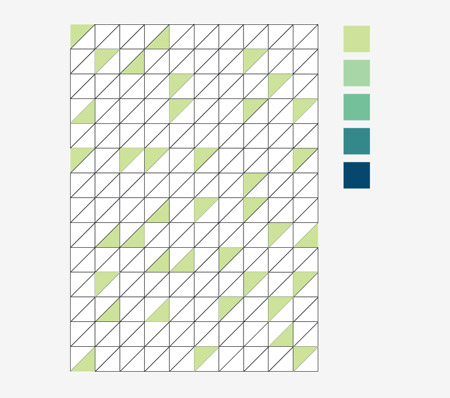
Draw a selection around all objects then hit the Divide option from the Pathfinder tool palette. This will split all the lines into individual shapes.
Right click and select Ungroup to split up the objects then draw a selection and delete any shapes beyond the edge of the artboard.
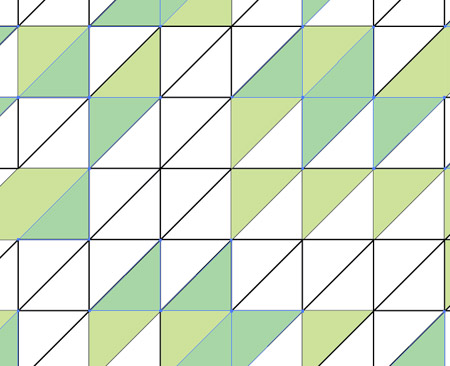
Now let’s add some colour! First we’ll need a basic palette to work from, here I’ve picked out a mix of greens/blues from ColourLovers.com. Begin by randomly selecting a bunch of shapes while holding the Shift key, then add the colour fill using the Eyedropper tool on your temporary swatch.
Continue selecting empty shapes then give them a colour fill using the next swatch in the palette.
As more colours are added the design really starts to take shape…
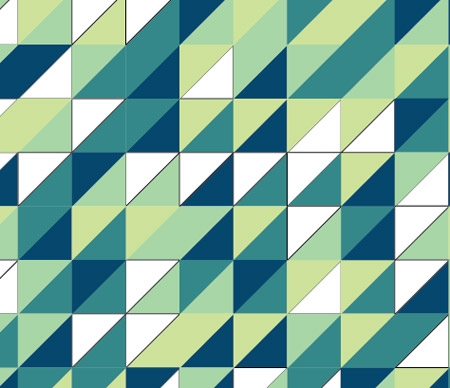
…until eventually the whole design is filled with colour. Make any adjustments if there’s any dense areas of a single colour, or sparse areas that lack one of the other swatches.
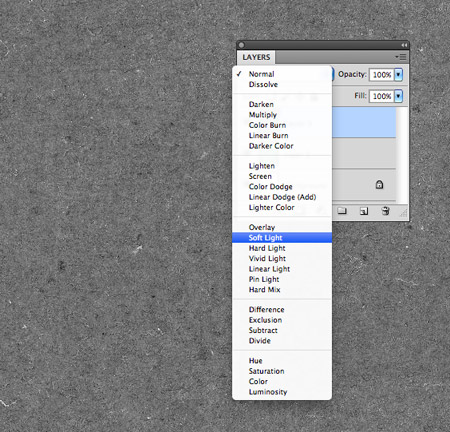
The pattern itself is complete, but it wouldn’t be a Chris Spooner design tutorial without a texture overlay! Copy and paste the design into Photoshop and open up a texture file. Desaturate the image and set the blending mode to Soft Light, then adjust the opacity to tone down the effect of the texturing.
The texture overlay just helps add that tactile feel to the design to help remove the flat appearance of digital graphics. The uses for this kind of pattern are endless, it could be the base of a business card design, a skateboard deck design or even just as a printed poster. |

| You are subscribed to email updates from Blog.SpoonGraphics To stop receiving these emails, you may unsubscribe now. | Email delivery powered by Google |
| Google Inc., 20 West Kinzie, Chicago IL USA 60610 | |
Aucun commentaire:
Enregistrer un commentaire