
Spoon Graphics | Latest Blog Entry |

| How to Create a Cute Vector Bear T-Shirt Design Posted: 11 Jan 2010 12:00 AM PST One of the great things about designing with vector shapes is that any design, especially characters, can be developed out of basic shapes, giving a simple and stylized style. Let’s get busy with Adobe Illustrator and design a cute bear character and surrounding scenery in just two colours, ready for use as a cool t-shirt design.
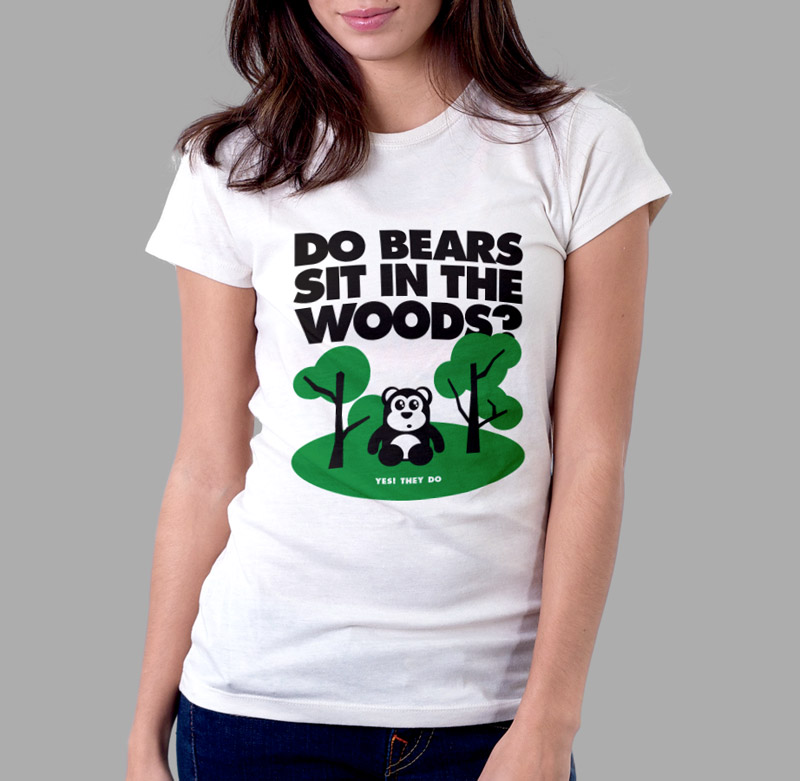
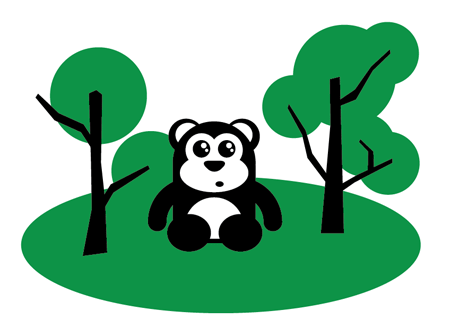
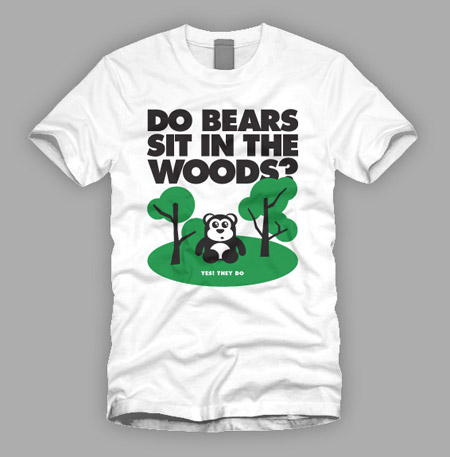
Here’s the design we’ll be building. It features a cute little bear sat peacefully in his natural surroundings, accompanied with the good old saying “Do bear s*it in the woods?”, but with a little twist of course! Often with textile based designs, you’re limited to a set number of available colours, especially if the design is to be printed using the popular screenprinting process. These are usually specified as Pantone swatches, so one initial task would be to open up your Pantone colour libraries from within Illustrator. Click the little options arrow in the Swatches paletter, then select Color Books and Pantone Solid Coated. From here you can select your chosen colour swatches.
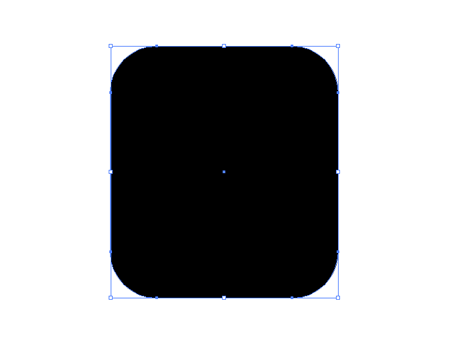
Start work in Adobe Illustrator and create a new document. With vector artwork having the advantage of scalability, the initial document size isn’t too important, but a rough size of 11×11 inches will then allow you to tweak the size according to any printer’s templates. Draw a rounded rectangle onto the artboard and adjust the corner radius while dragging with the keyboard cursor keys.
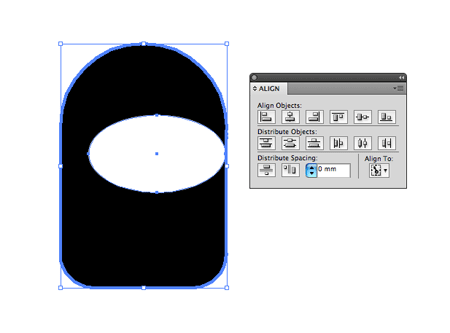
Next, draw a perfect circle to the exact width of the rectangle and overlap the upper most corners. With both items selected, use the Unite option to merge the two together.
Draw a white oval over the two previous items, then use the align palette with center everything up vertically. Giving the main body an extra click while selecting the objects will center all objects to this shape (indicated by the thick blue outline).
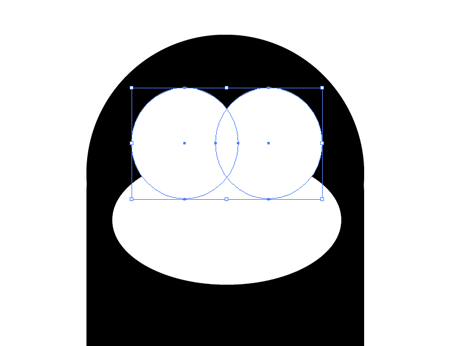
Draw an extra circle that overlaps the white oval, duplicate this shape and move it to the opposite side.
Continue drawing circles to produce an eye. Using just a large black circle with two smaller highlights should do the job. Group the eye, then duplicate and move to the other side.
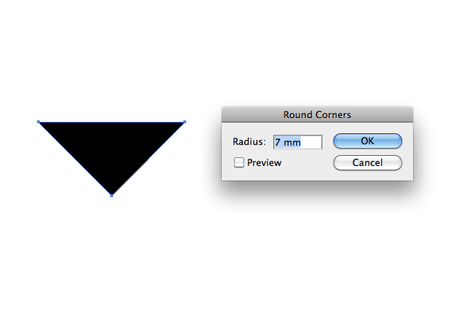
To create the nose, start with the Star Tool, and press the down cursor key while dragging out the shape to limit the points to three. Adjust the shape slightly by moving the end point with the Direct Selection Tool, then add some round corner styling by going to Effect > Stylize > Round Corners.
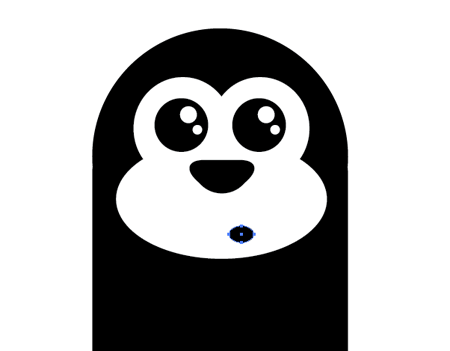
The bear’s face is coming along nicely; Finish it off with a small oval to form a curious mouth.
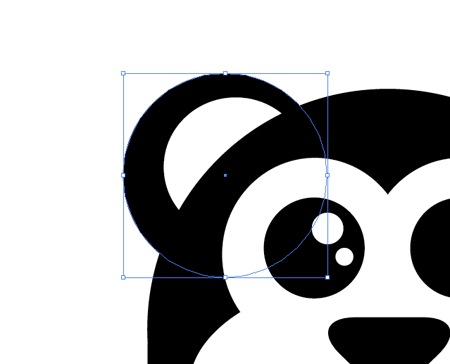
Draw a couple of circles, one in black, and a smaller circle in white to form an ear. Press CMD+[ to alter the stacking order of the objects and send the ears to the bottom, so that they peek out from behind the main head outline.
Copy and paste the ear, then go to Object > Transform > Reflect and position on the other side of the head.
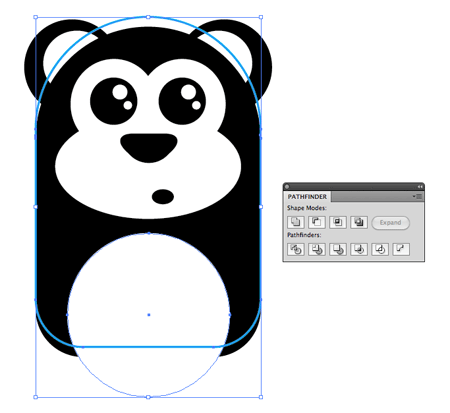
Draw a large white oval to form a belly for the bear. Center everything up, then duplicate the main body shape. Send this shape to the top and move it upwards a few nudges, then with the belly oval selected, click the Intersect option from the Pathfinder to trim out the excess.
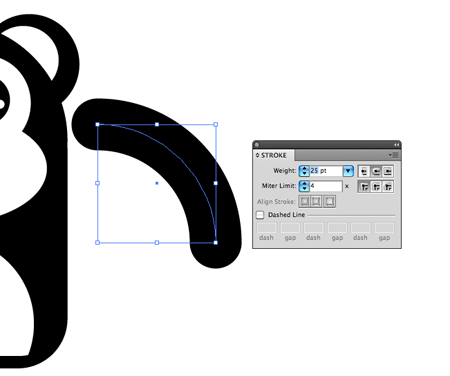
Draw an arm by starting with a large circle. Use the Direct Selection tool to delete out two of the four points, to leave the path of a quarter-circle. Adjust the stroke to around 25pt and select the round cap option. Send the arm to the bottom of the stack using the shortcut CMD+Shift+[, then duplicate and reflect to the opposite side.
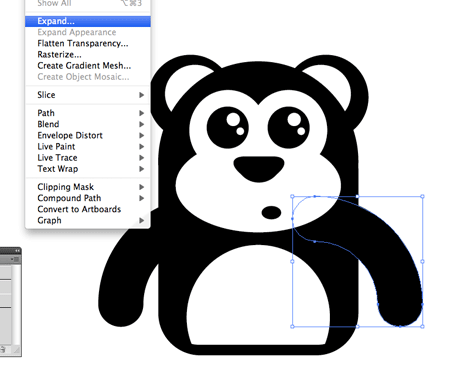
The arms are still made out of paths and strokes, so select each one and go to Object > Expand and select just the stroke option. This converts the outline into a solid shape.
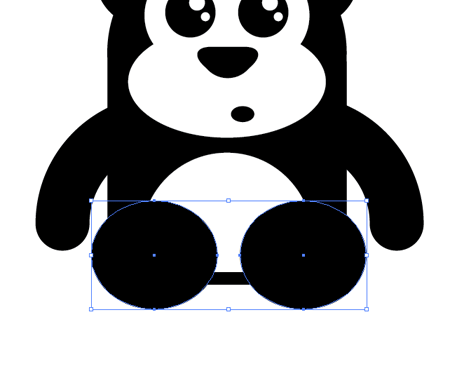
Finish off the bear by drawing a couple of ovals to represent the feet of a bear sat down. Remember to align everything up vertically so that the bear is symmetrical.
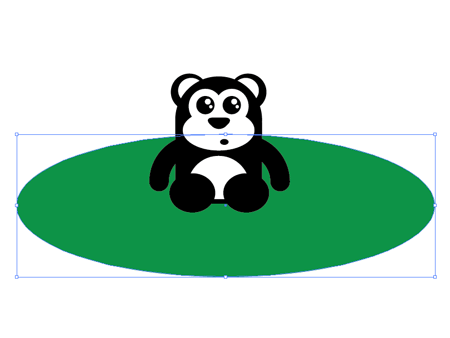
Start work on the surrounding scenery with a large green oval and position centrally and at the bottom of the stack.
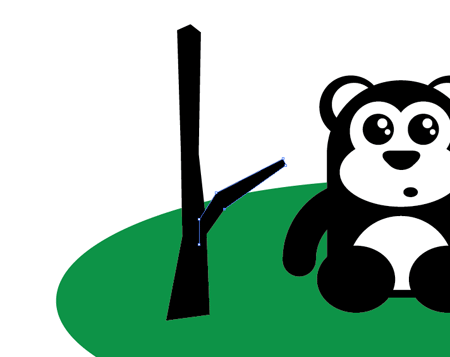
Using the Pen Tool, roughly draw some abstract tree shapes using a black swatch. Start with the trunk, then create randomly shaped branches.
Continue drawing trunks and branches until you have a couple of tree shaped filling up the background.
Use a range of green circles to represent the leaves and greenery of the trees by positioning them around the branches.
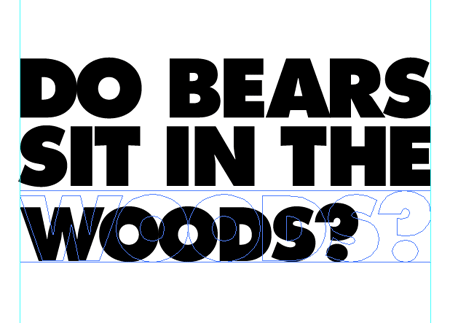
Next, add a little slogan to the design. Here I’ve typed out a fun little message in Futura Extra Bold and converted to outlines (CMD+Shift+O) to enable more advanced editing as if the letters were shapes. Using guides, scale up the words so that their edges are flush.
Move each item into place to finish off the design. Masking off the lower portion of the typography behind the trees helps unite the two elements of the design.
All that’s left is to select all (CMD+A) and group everything together (CMD+G) ready for exporting the final vector file or PDF. |


| You are subscribed to email updates from Blog.SpoonGraphics To stop receiving these emails, you may unsubscribe now. | Email delivery powered by Google |
| Google Inc., 20 West Kinzie, Chicago IL USA 60610 | |
Aucun commentaire:
Enregistrer un commentaire