
Spoon Graphics | Latest Blog Entry |

| How to Build a Custom Wordpress Theme from Scratch Posted: 15 Feb 2010 12:00 AM PST If you’re confident with your CSS and HTML, it’s not hard at all to step up to the challenge of building a custom Wordpress theme. This overview shows the process of how my latest custom Wordpress theme was built from design concept through to completed theme. See how the static design is split up into the various Wordpress theme files, and discover how the simple PHP snippets can add that dynamic functionality of a blog.
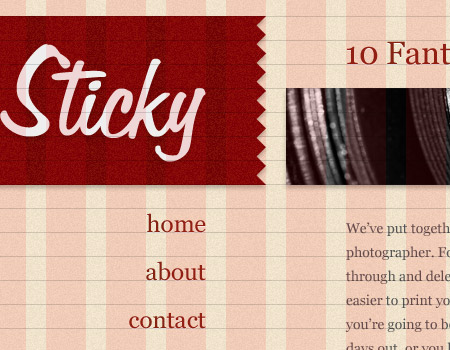
The design concept
The theme I'm working on is named Sticky. The main feature of the design is its sticky sidebar (hence the name Sticky!), which stays in place while the main content scrolls past it. There's also a few fancy effects such as the shadows and inset text appearance that I'll be building with the help of CSS3.
With the post focusing on the production of the theme, I won't go into too many details on how the design was built, but you can see from the Photoshop previews that it uses a 16 column grid with 24px baseline; a fairly muted colour palette of a beige and grey, with a dark red as a highlighting colour for links; typography is set to serif font throughout for that touch of class!; and the whole design uses very subtle textures to give a more realistic and tactile feel. Anatomy of a Wordpress themeBefore getting stuck into the build process, it's important to know how Wordpress themes work. If you've looked at any prebuilt theme, you'll notice that it's all contained in a folder, and there's around 12 core files. Some themes, including the Default Wordpress theme, include more files which allow extra customisation, but aren't mandatory additions. Here's an overview of the main files you'll be working with:
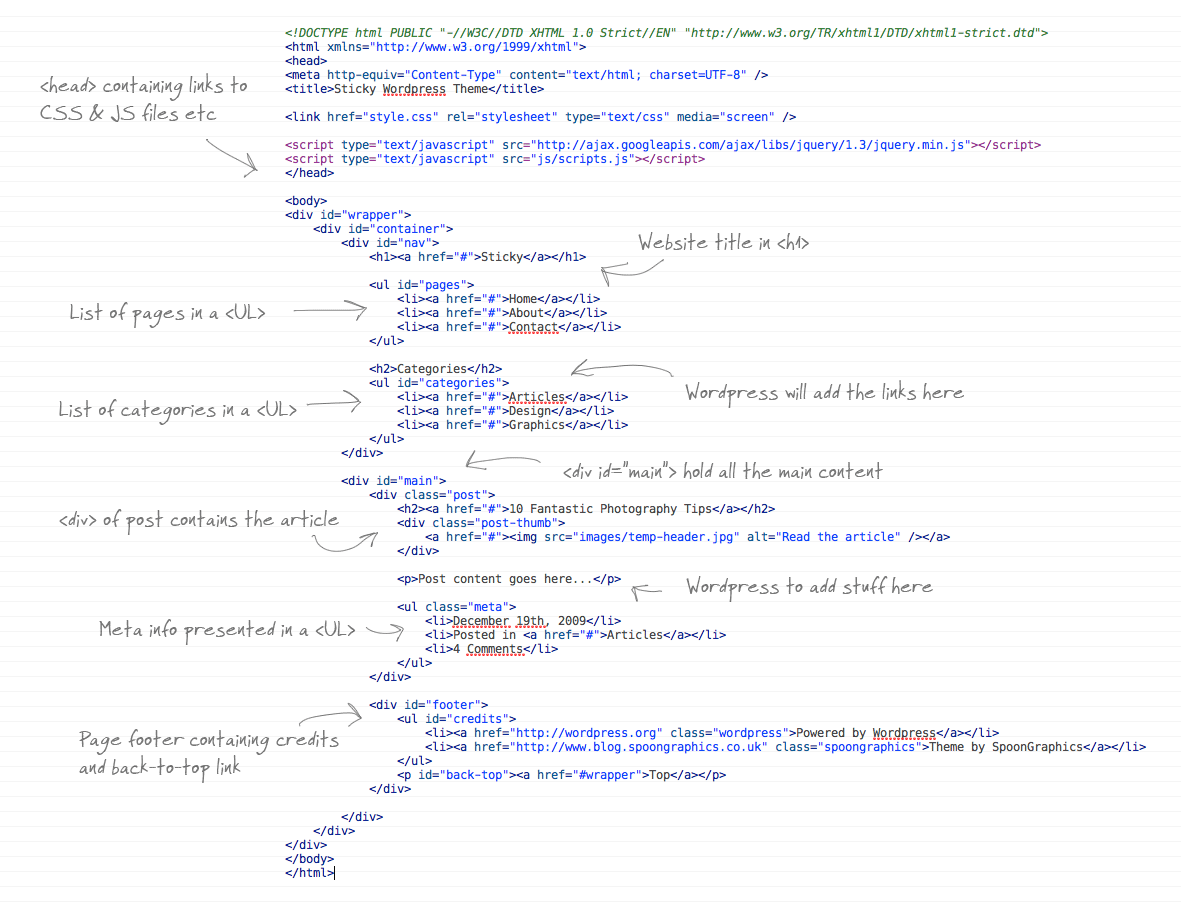
Each of these files then contains a series of PHP template tags. These tags tell Wordpress where to insert the dynamic content. A good example is the There's stacks of template tags available, and more often than not there will be one that does exactly what you want - It's just a case of finding it in the Wordpress Codex. I've seen many themes that include some complicated PHP coding to achieve a function that's already available as a simple template tag, so remember to browse the Wordpress Codex whenever you're stuck! The basic HTML and CSSSeeing as a Wordpress Theme is basically made up of HTML and CSS, but with a few extra PHP tags inserted here and there, it's important to build your website concept as you would a good old static site. I tend to build the complete page with dummy content, then do my browser testing before starting work on the theme. Here's an overview of my HTML code:
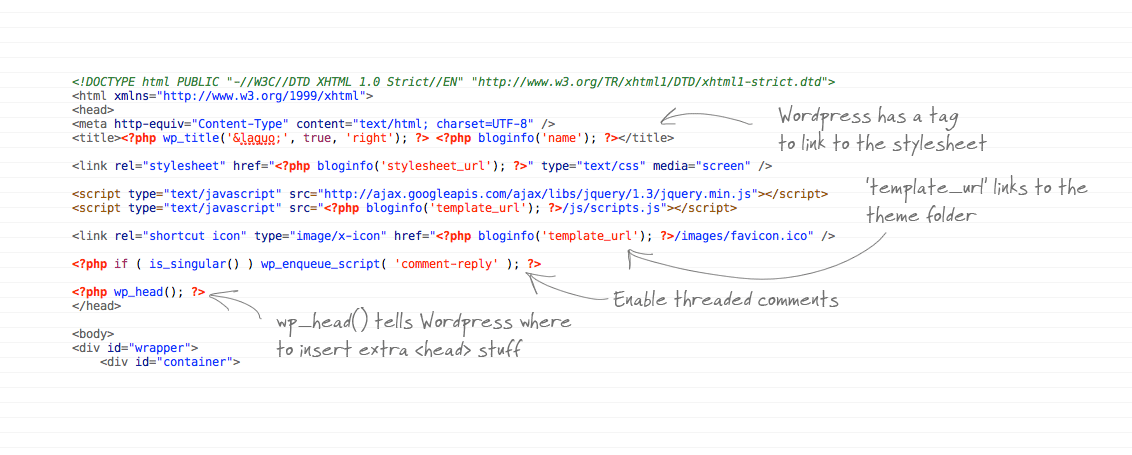
Building the Wordpress themeNow the actual design is taking shape in code form, it's time to start converting the static HTML and CSS into a Wordpress theme. Begin by creating a folder for your theme and creating the php files above (header.php, etc). Sometimes it's easier to download the Wordpress application, then duplicate the Default theme, and delete out any extra fluff that comes with it. Either way, you'll want all your PHP files in place, and all your images and Javascript files copied into your theme folder. Configuring the stylesheetAll the details of a Wordpress theme are contained within the stylesheet. At the top of your style.css add the following code, then amend the details to suit. /* Theme Name: Sticky Theme URI: http://www.blog.spoongraphics.co.uk Description: Sticky Wordpress theme Version: 1 Author: Chris Spooner Author URI: http://www.spoongraphics.co.uk */ Also remember to ensure that the paths to any background images are correct in your CSS properties. Populating the headerOpen up your header.php file, and paste in the head section from your concept HTML file. Then we need to go in and replace certain elements with the correct Wordpress template tags to ensure it all works correctly. First we can strip out the title and insert some Wordpress template tags.
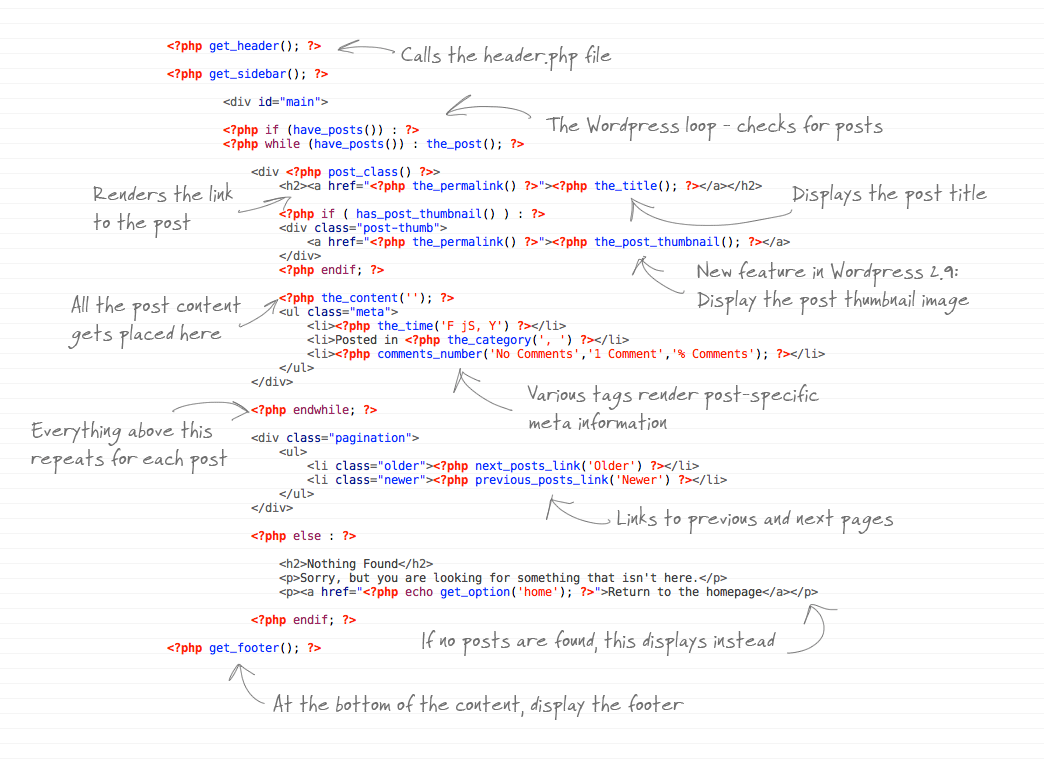
If you would like your theme to make use of threaded comments, a snippet can be placed that will call the relevant Javascript files from the Wordpress core. Then to before the closing Building the indexThe next step is to flesh out the main body of the website. Open up the index.php file and paste in the main bulk of the concept HTML.
This is where all the meaty stuff begins! At the top we have the
In the meta section, there's various tags that can display specific information about the post, such as the time it was posted, the category it was posted in and how many comments it has. All of these can be called using a template tag such as Skipping down a little, the loop then displays an Filling out the sidebarThe sidebar in my design is where the list of pages and categories are held. The sidebar.php file was called from the index using the
There's only three elements in my sidebar; the logo, the pages list and the categories list. The logo is wrapped in a h1 tag and uses the tags Rounding off the footer
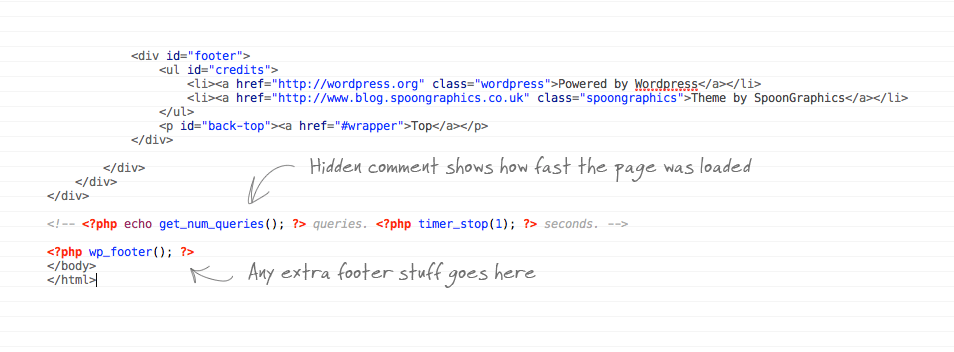
The footer.php file is probably the most simple file for this theme. The only thing that goes in here is the Creating the archive
The archive.php file is used to display a list of posts whenever they're viewed by category, by author, by tag etc. It's basically the same as the index file, but with the addition of a tag at the very top that renders a useful page title, so the user knows where they are. 'Browsing the Articles category' for instance. Constructing the page and single view
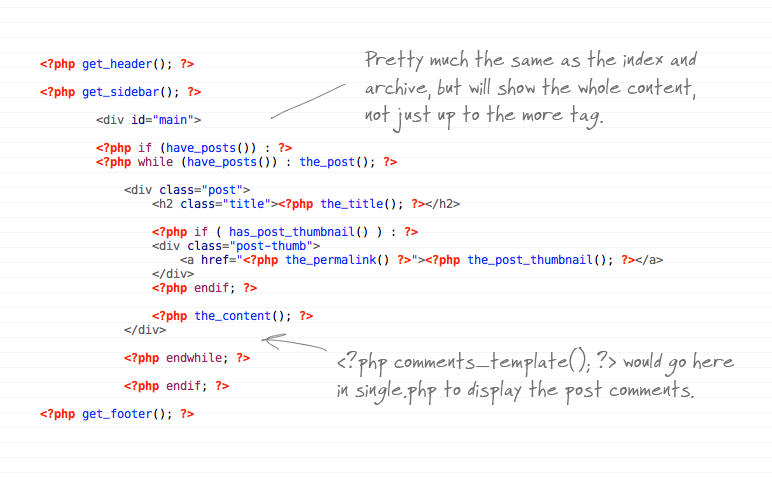
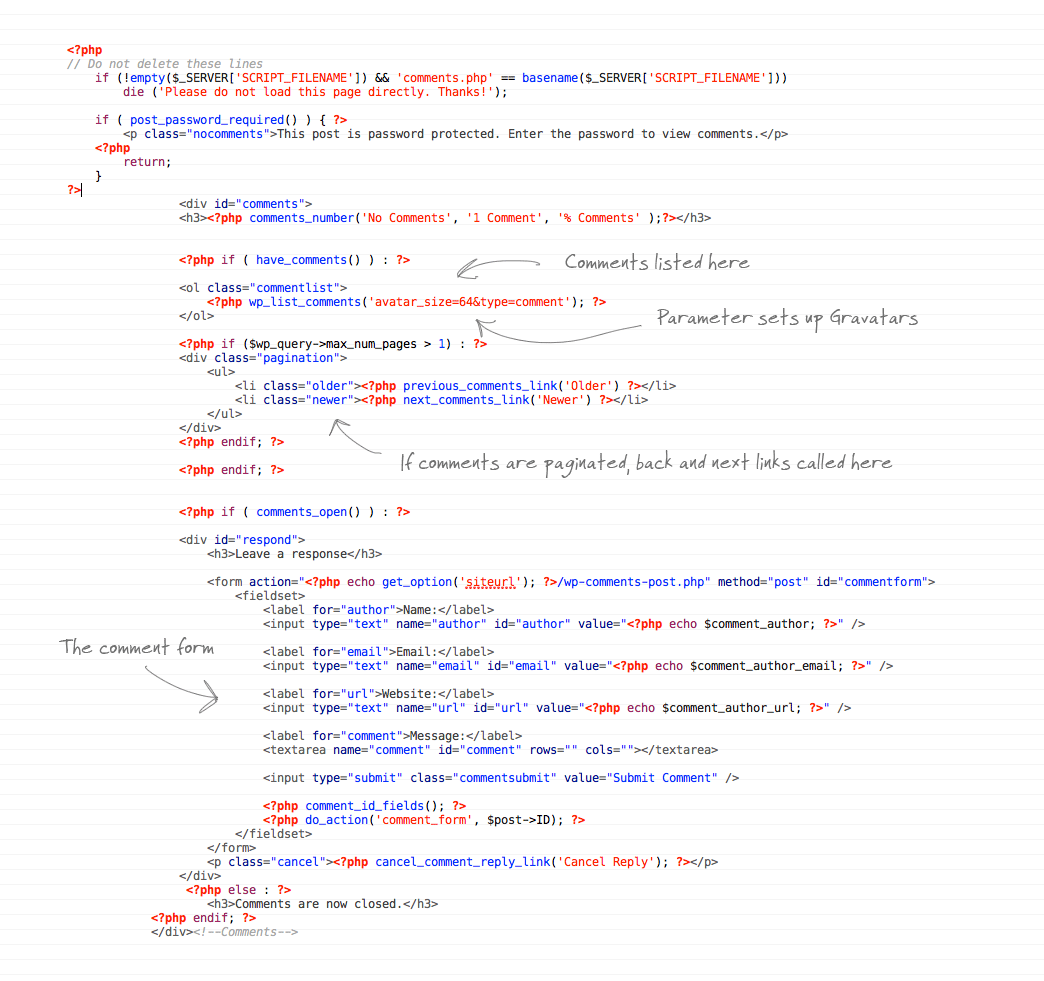
Wordpress is made up of posts and pages. Posts use the single.php template file, whereas pages use the page.php template file. They're pretty much the same, apart from that you tend to include the Configuring the comments templateI usually copy the comments template from the Default theme, then make my changes because it includes some important lines of Wordpress code.
Once you have a comments file created, the same file can be used on pretty much all your future Wordpress theme projects. The hard part is finding the CSS hooks to style up your comments. This is when the Firebug plugin for Firefox comes in handy. Otherwise, the comments file just has a few parameter options here and there that you might want to tweak. One that springs to mind is the Finishing off the search and 404This pretty much just leaves the search feature, which is basically a copy of the archive.php file. A handy additions might be the line The final theme
When all your theme files are complete, it's time to install a test and see how it all works. Filling out a temporary install with a couple of dummy posts can really help test drive a theme surface any errors. If you take a glance at the source code, you'll see how each of the template files has been inserted into the correct place, as well as how content has been dynamically generated by the template tags. View the final Wordpress theme demo If you like the look of the Sticky theme, it's due to be released exclusively to Access All Areas members next week. |


| You are subscribed to email updates from Blog.SpoonGraphics To stop receiving these emails, you may unsubscribe now. | Email delivery powered by Google |
| Google Inc., 20 West Kinzie, Chicago IL USA 60610 | |
Aucun commentaire:
Enregistrer un commentaire