samedi 26 février 2011

Blog.SpoonGraphics | Latest Blog Entry

Blog.SpoonGraphics | Latest Blog Entry


Ronin App Discounted Rates for Premium Members

Posted: 24 Feb 2011 11:00 PM PST

The awesome folks behind the online invoicing and time tracking app Ronin have kindly arranged a special discounted rate for Access All Areas members here on Blog.SpoonGraphics. If you're a freelancer looking for a thorough solution for billing your clients, this special package from Ronin will give you features from ...

Log in to your Access All Areas account to read the rest of this post.

Not a member? Becoming an Access All Areas member gives you the ability to view exclusive members-only content just like this. The premium category is already packed full of discount codes and useful design resources, and there's plenty more to come! Find out more about becoming a member, or take a peek at what's available to premium members so far.

mardi 22 février 2011

Spoon Graphics | Latest Blog Entry

Spoon Graphics | Latest Blog Entry


How To Create a Colorful Logo Style Icon in Illustrator

Posted: 20 Feb 2011 11:00 PM PST

Follow this step by step to create a vibrant and colourful logo style icon graphic. This style of abstract three dimensional shape has become a popular trend in the world of logo design. Today we’ll look at how to build the graphic in Illustrator using a range of tools and techniques.

Colourful logo icon

Usually I’d always recommend for a logo to be developed in relation to the company or brand it is representing, but today we’re just going to look at the technical part of building this generic icon. This graphic features many of the trends in logo design seen today – The three dimensional appearance, gradients and variances in tone.

Open up Illustrator and create a new document. Grab the circle tool and begin laying out the basic shapes of the icon. Place a small circle inside a large circle, then add smaller circles between the outlines of the two.

Zoom in and press CMD+Y to switch to outline view. This will help you accurately align the shapes so the paths match exactly without any overlap.

Use the Scissors tool to clip each path where the two lines meet, then select the unwanted portions of the shapes and delete them.

Zoom in and select the two open points from each paths, right click and select Join. Repeat this for each of the clipped lines to form one continuous path outline. Make a copy of this shape as we’ll need it later.

Draw another circle over the shape so the outline cuts across and neatly flows back into its outline.

Use the Scissors tool to cut points where the two lines intersect and delete out the excess, leaving just a line flowing along the inside of the graphic.

Continue adding lines inside the graphic using circles of various sizes, then cut and delete out the excess with the Scissors tool.

Select the Pen tool and click on the open point of the line to continue the path. Roughly draw a route around the graphic until you reach the other end and click on the remaining open point to close the path. Select this shape along with the overall graphic shape and click the Divide option from the Pathfinder window.

Right click and select Ungroup, then delete out the shape with the rough outline. Give the newly created segment a colour fill to identify it.

Continue this process with the remaining segments, creating smooth shapes from the intersecting lines. Add random colour fills to each piece.

Use the Gradient tool to switch the ugly tones for vibrant colours. Select colours in their colour wheel order (or rainbow order!), so the first piece flows from red to orange, the second from yellow to green and so on.

Switch the gradient style to Radial and adjust the flow so the colours run nicely along the direction of the shape.

The graphic is looking pretty cool so far, but we can enhance it with some clever shading. Draw a circle to intersect the first shape.

Select this circle along with the first segment and press the Intersect option from the Pathfinder palette.

Repeat this process for the other segments, then give these shapes a black fill with the settings of Multiply at 10% opacity.

Hopefully you saved that original outline we created as we’ll now need it to overlap our logo graphic. Carefully position the shape so it fits perfectly over our colour version.

Give the shape a white fill and set it to Multiply, then go to Effect > Stylize > Inner Glow. Alter the settings to Multiply, Black, 20% opacity and 5mm blur.

Colourful logo icon

The addition of various gradients, shading elements and the inner glow effect really enhances the graphic, giving it depth and a three dimensional appearance.

If you enjoyed this post, please consider giving it a tweet or a thumbs up using the social buttons below to share it with your friends. It really helps out!

Download the source file

samedi 19 février 2011

Spoon Graphics | Latest Blog Entry

Spoon Graphics | Latest Blog Entry


Is it Hard to Start a New Design Blog? (and more!)

Posted: 18 Feb 2011 12:00 AM PST

In this week’s question time I talk about how I work out deals and offers for my premium members, how hard it is to start a new design blog and why I don’t make many tutorials in video format.

This week’s questions:

  • How do you work out deals with your affiliates to offer discounts on their services with your premium content?
  • Is it hard to start new design tutorial blog as a freelancer?
  • Why don’t I make more video tutorials?

News:

HTML5 Grayscale Image Hover

7 Common Project Management Problems (And How to Solve Them)

Design a Vintage Style Swissair Travel Poster In Photoshop

If you have a question for the next episode, post it in the comments below!

vendredi 18 février 2011

Spoon Graphics | Latest Blog Entry

Spoon Graphics | Latest Blog Entry


BundleHunt 3 is Here! – Lots of Goodies for Designers

Posted: 17 Feb 2011 01:55 AM PST

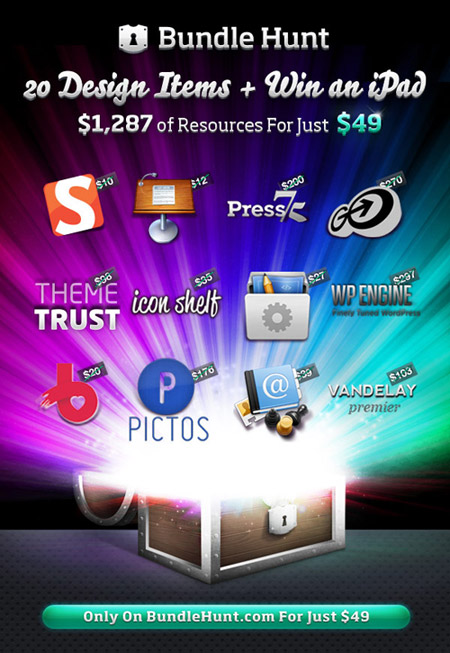
If you’re not familiar with BundleHunt you’ve been missing out! Every so often the site springs to life with an awesome collection of design resources including Photoshop brushes, applications, vector packs, WordPress themes are more! BundleHunt 3 is now live with over £1287 of goodies for just $49. Read on to see what you can get your hands on this time.

The bundle includes such interesting products as Pictos Icon Set, GoMedia Arsenal Ultimate Vector & Font Collections, Wordpess themes from Press75, the newest Smashing eBook and 3 month MultiSitePlan from WPEngine.

The idea for this release is to put together a complete design resource pack for web developers across the board for the smallest price in history. BundleHunt 3 comes with a number of new premium applications included such as CodeCollector Pro, Relationship 2, 6 outstanding WordPress themes by Press75 and ThemeTrust and SmashingMagazine's newest e-book. In all, there are 20 applications and products included in the bundle, all for an amazing price: $49.

What do I get in my Bundle?

Smashing eBook #5: E-Commerce: This e-book steps you through the preparation of your e-commerce projects.

WPEngine: 3 Month Multi Site Hosting Plan.

GoMedia Arsenal includes their outstanding Ultimate Vector Collection 2 and the Ultimate Font Collection.

Pictos Iconsets: Hand Crafted, Infinitely Scalable & Royalty-Free Icons for User Interface Designers. Includes Pictos 1,2,3 + Pictos Font.

VandelayPremier Pack: Offering high-quality textures, brushes, vectors, icons, PSDs, and career resources to make your life easier and your business more
successful.

BrushLovers: You get to choose 20 Premium BrushSets from their gallery.

Code Collector Pro :A powerful Mac tool to Organise Use & Share Code Snippets.

Relationship 2: Ideal for contact and project management on your Mac.

Keynote Wireframe Toolkit: Gives you the building blocks to put together great looking prototypes in no time.

Press75 contributing with 4 Premium WordPress Themes: Relay , Roundabout,
ReCapture, OnDemand.

ThemeTrust included 2 of their newest themes: Filtered and Oracle.

IconShelf Complete Set. Over 200+ high quality icons.

BundleHunt 3 is ending soon (Midnight EST on 21st Feb) so act quickly to get your hands on this collection of goodies for just $49 (total RRP: $1287)

As if that’s not enough, there’s also a couple of cool incentives:

Bonus #1: Win an iPad

This bundle not only saves you big money but also could win you an iPad (6GB/WiFi) loaded with 5 best selling e-books for web designers & developers.

Bonus #2: Tweet to Win

Three users who tweet about the bundle will win the 3 Bonus Items each day during the bundle. No Purchase necessary. The 3 bonus items are:
Business Icon Set (Worth $25)
10 DepositPhotos Credit (Worth $500)
WPBids Theme (Worth $59)

Interested users can purchase the bundle on http://www.bundlehunt.com. Information on each product and screenshots can be found there.

Visit the BundleHunt website