Blog.SpoonGraphics | Latest Blog Entry |
| Create a Trendy Retro Photo Effect in 3 Easy Steps Posted: 30 Sep 2012 11:00 PM PDT Retro photo effects are all the rage! There’s plenty of apps to give your photos the vintage look in your iPhone, but what about your desktop images? Follow this super quick Photoshop tutorial to easily add a retro effect to your images in 3 simple steps, or just skip to the end and download the Action.
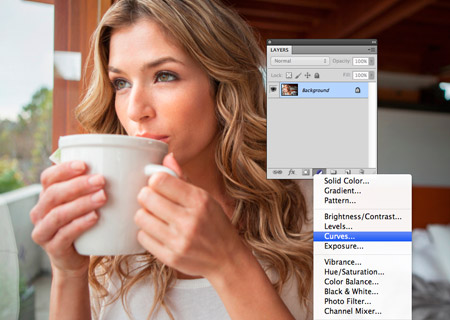
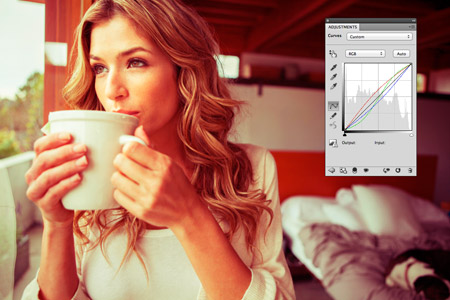
We’re going to use Photoshop’s Curves adjuster to modify the image’s colours. You can either do this by going to Image > Adjustments > Curves or by adding an Adjustment Layer. An Adjustment Layer is the better choice seeing as it’s non-destructive, allowing you to remove the effect at any time.
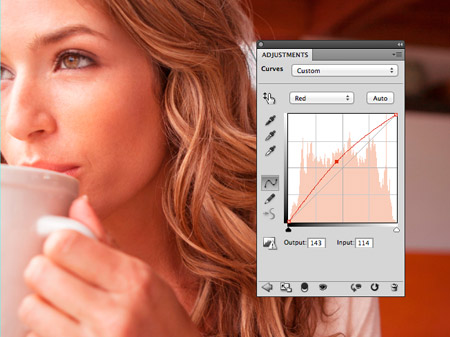
Step one: Change the drop down menu in the Curves options to the Red option, then click and drag the line and create a positive bend. This will increase the reds in the overall colour balance.
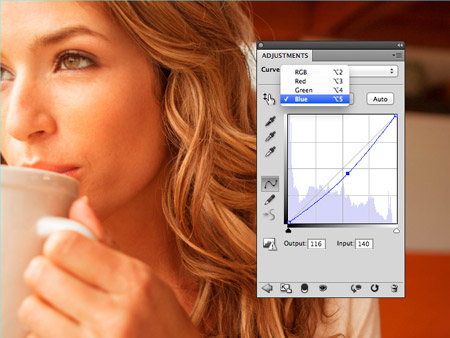
Step two: Switch the drop down menu to the Blue option. Drag this line to create a negative bend. This will decrease the amount of blue in the colour balance, giving the image more of a yellow tone.
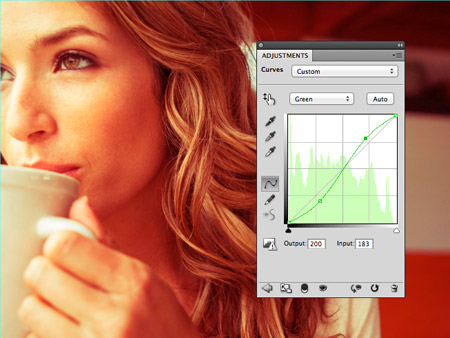
Step three: Change the drop down menu to the Green option and add two points in this line to create an S-shaped bend. This helps make the reds in the shadows more prominent, while bringing out those yellows in the highlights.
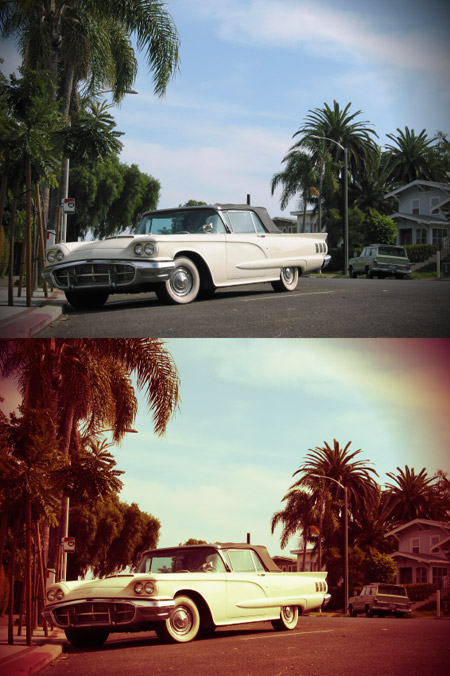
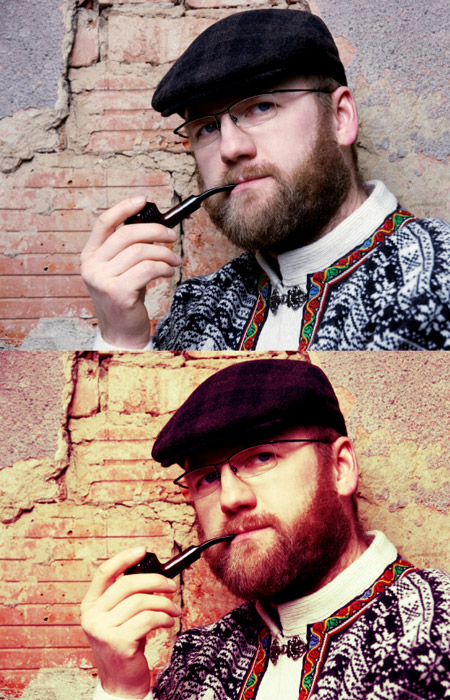
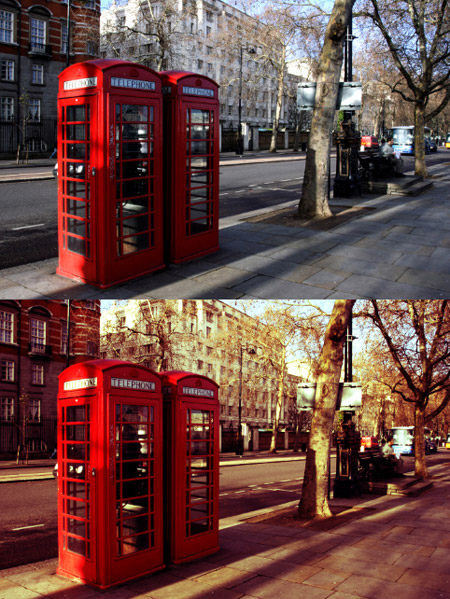
Fine tune the amount of adjustment on those curves lines to create the perfect retro effect. Retro photo effect examplesApply this simple process to any image to instantly give it that retro look.
Retro photo effect actionIf three steps sounds like too much effort, download the Photoshop action to add a retro effect to your images with just one click! |
| You are subscribed to email updates from Blog.SpoonGraphics To stop receiving these emails, you may unsubscribe now. | Email delivery powered by Google |
| Google Inc., 20 West Kinzie, Chicago IL USA 60610 | |


Aucun commentaire:
Enregistrer un commentaire